OpenClaw Walkthrough for Recruiters

What is OpenClaw?
OpenClaw is an open-source AI assistant you can self-host and connect to Slack, email, your ATS, and other tools. Think of it as your own AI that runs 24/7 and you control what it has access to.
We'll be using AlphaClaw as our setup tool. AlphaClaw abstracts away the complexity of getting OpenClaw running - https://github.com/chrysb/alphaclaw. The nice part is they have a one-click deploy to Railway or Render.
How much does it cost?
Two costs to know about:
Hosting - Railway or Render runs your OpenClaw instance in the cloud. Expect $5-20/month depending on usage.
AI API costs - OpenClaw needs an API key (Anthropic, OpenAI, etc.) to power the AI. Costs vary based on how much you use it, but for light use think a few bucks a month.
Steps
Create an account with Railway or Render. These are hosting providers that allow you to create a virtual machine in the cloud. This way all your services are isolated. We'll be using Railway as part of this tutorial, but if you choose to use Render, it should be fairly similar.
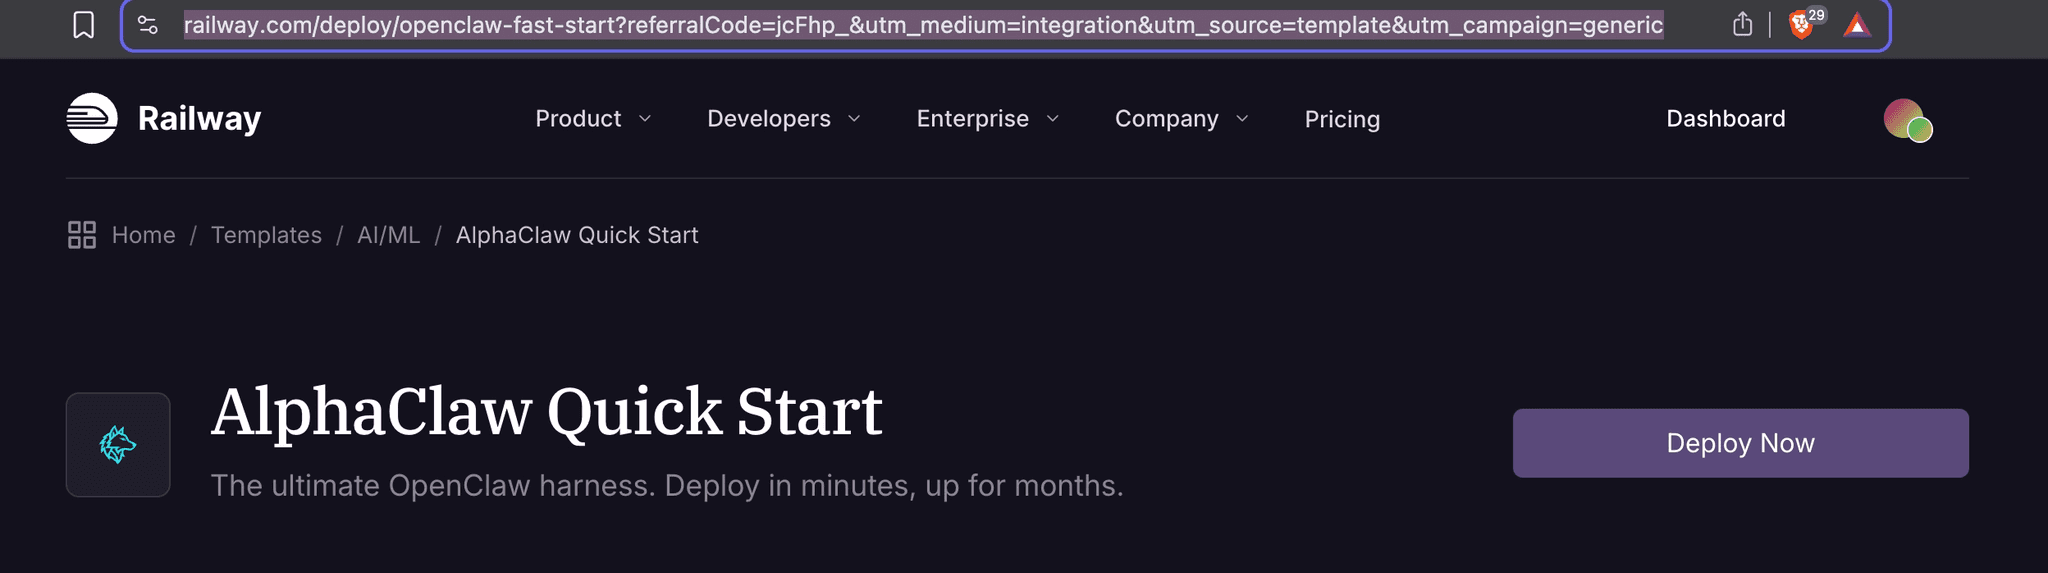
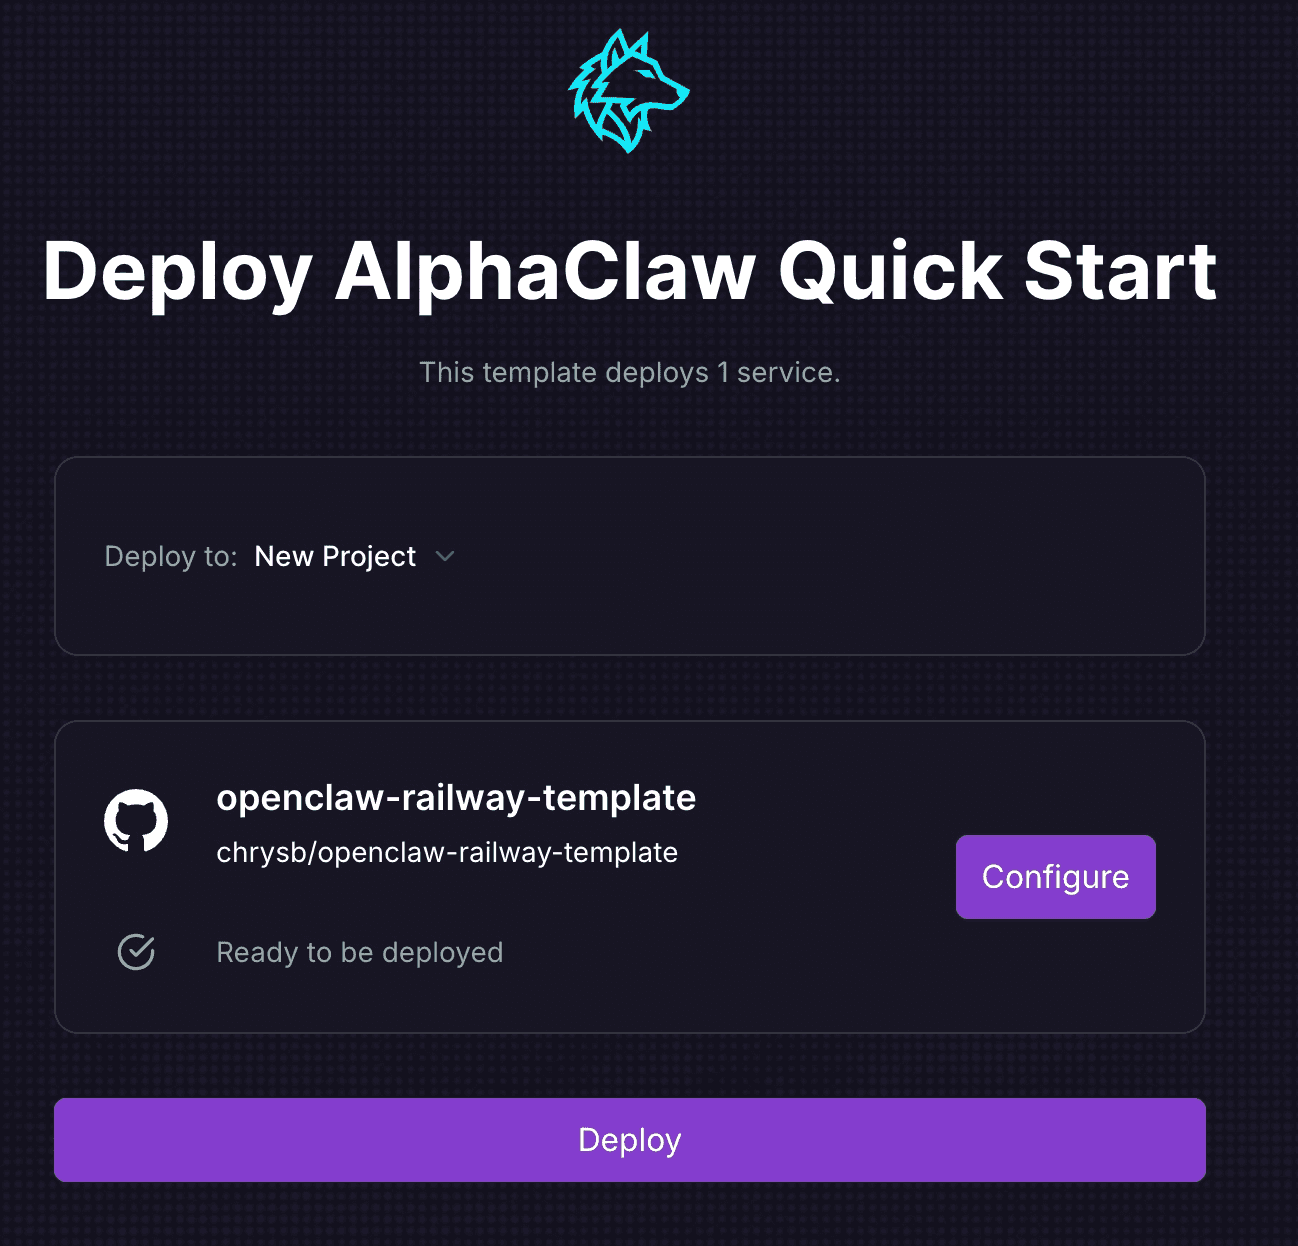
Goto https://railway.com/deploy/openclaw-fast-start and click "Deploy Now"
Click "Configure" to add your password. This will be your master password. Then hit "Save Config".
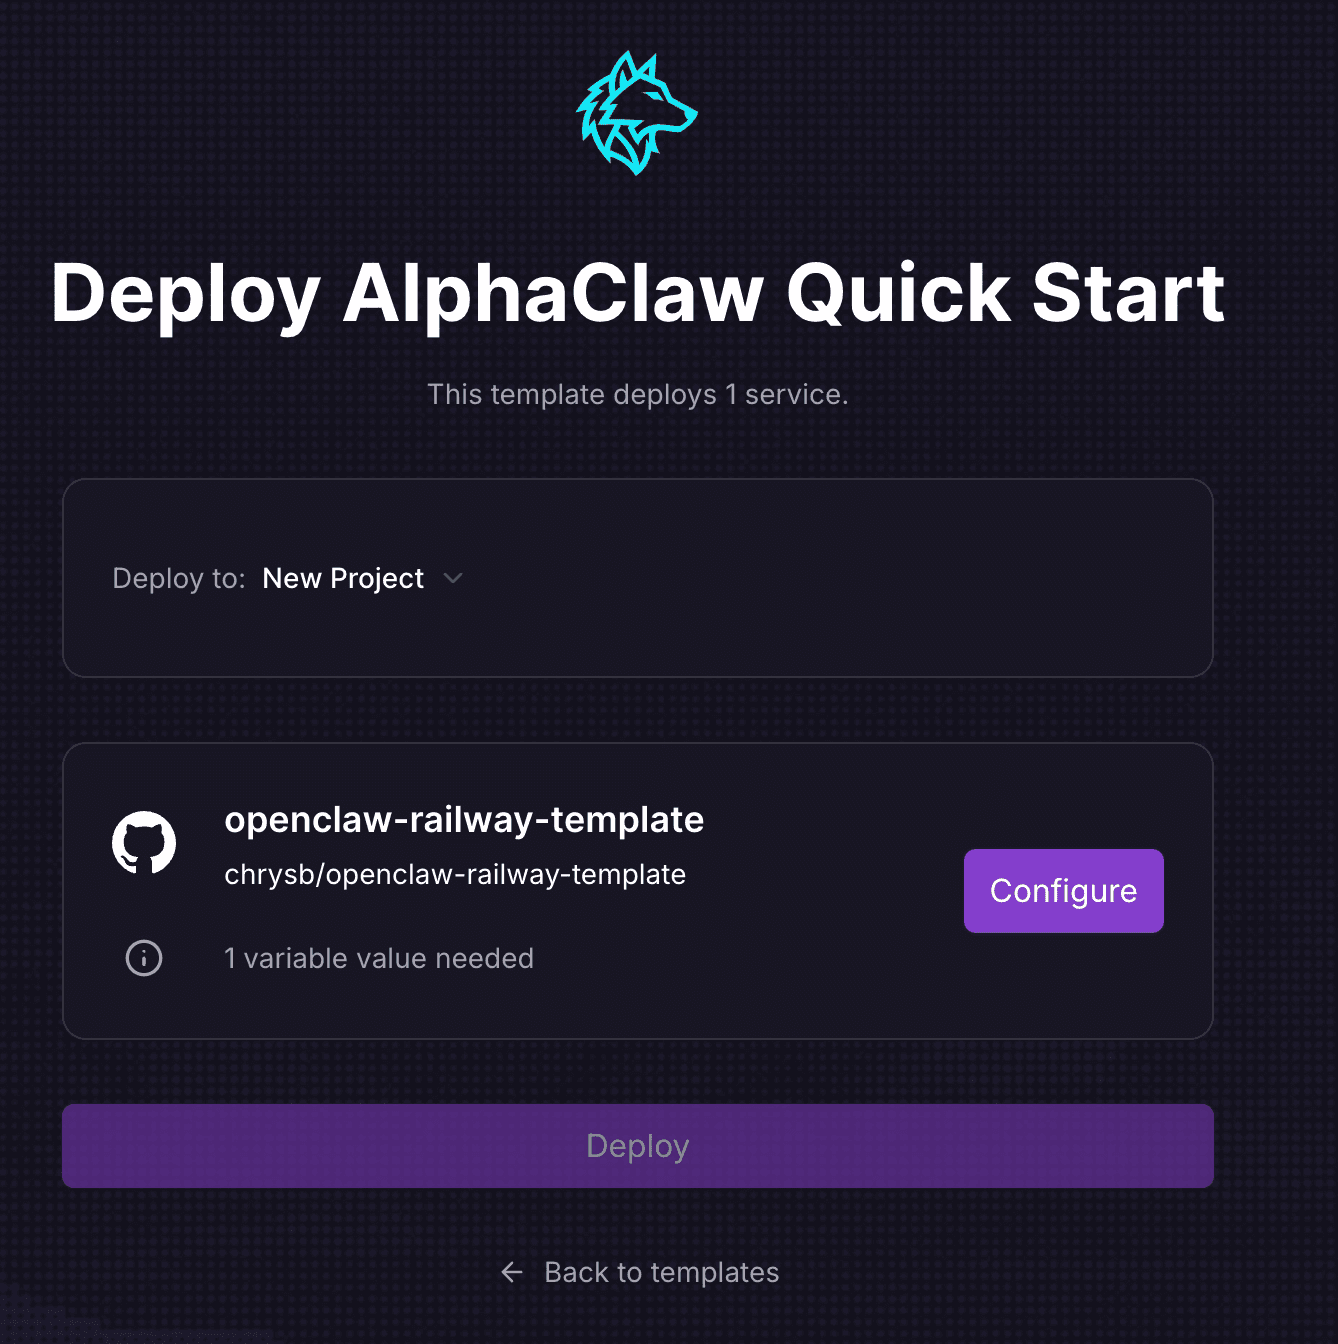
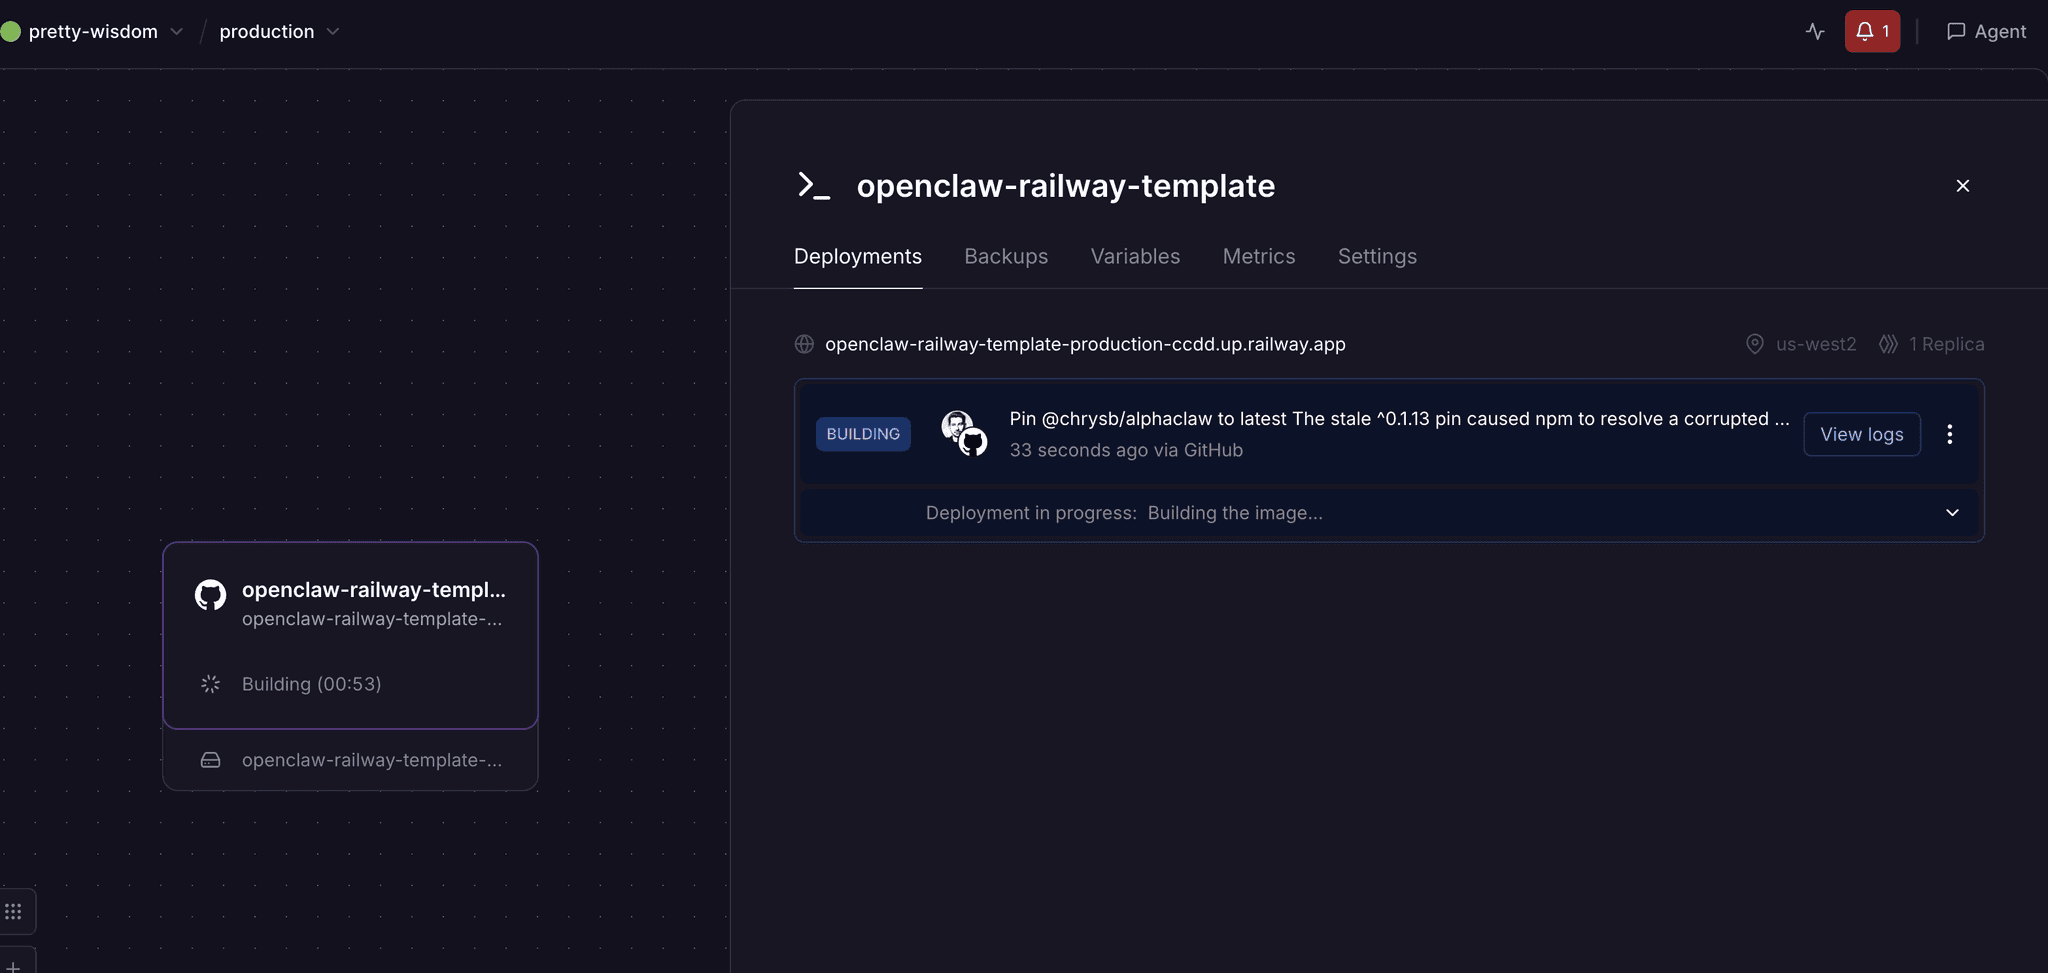
Click "Deploy" then wait for a couple of minutes. You should see a green success message “Deployment Successful”
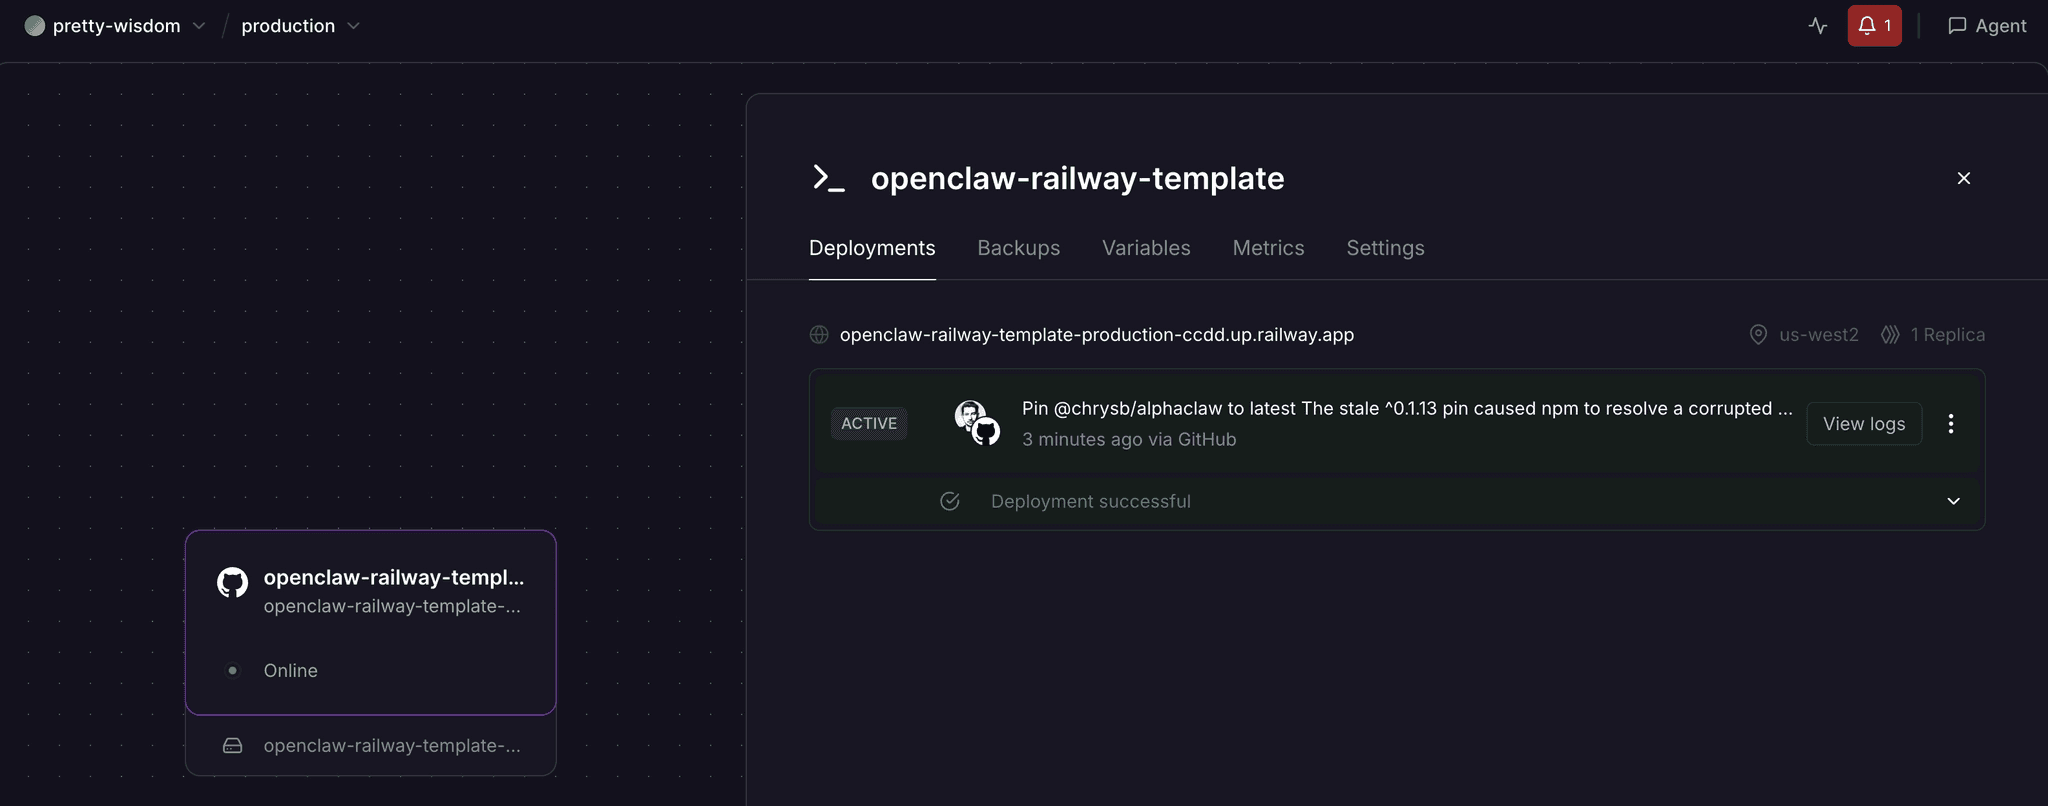
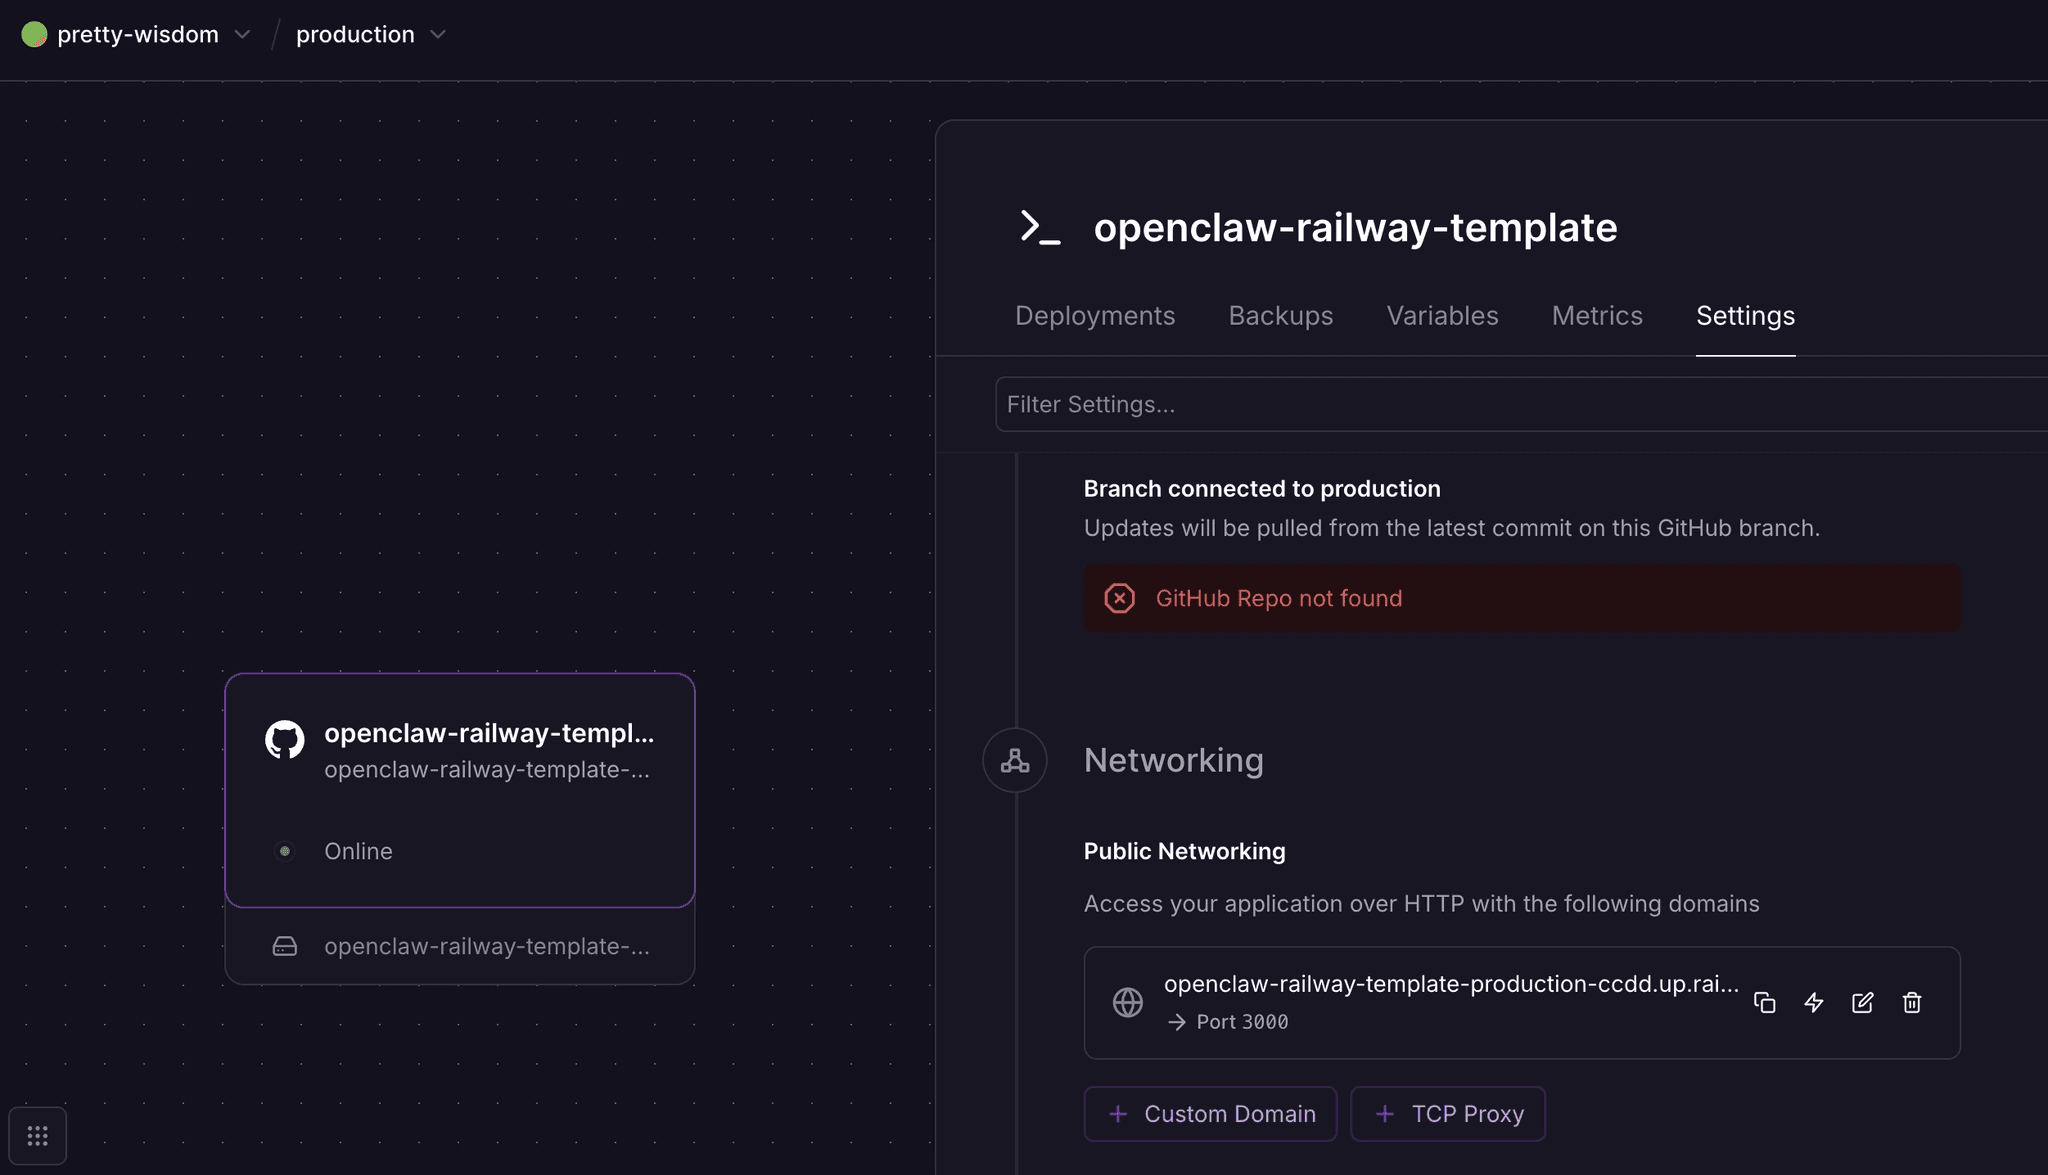
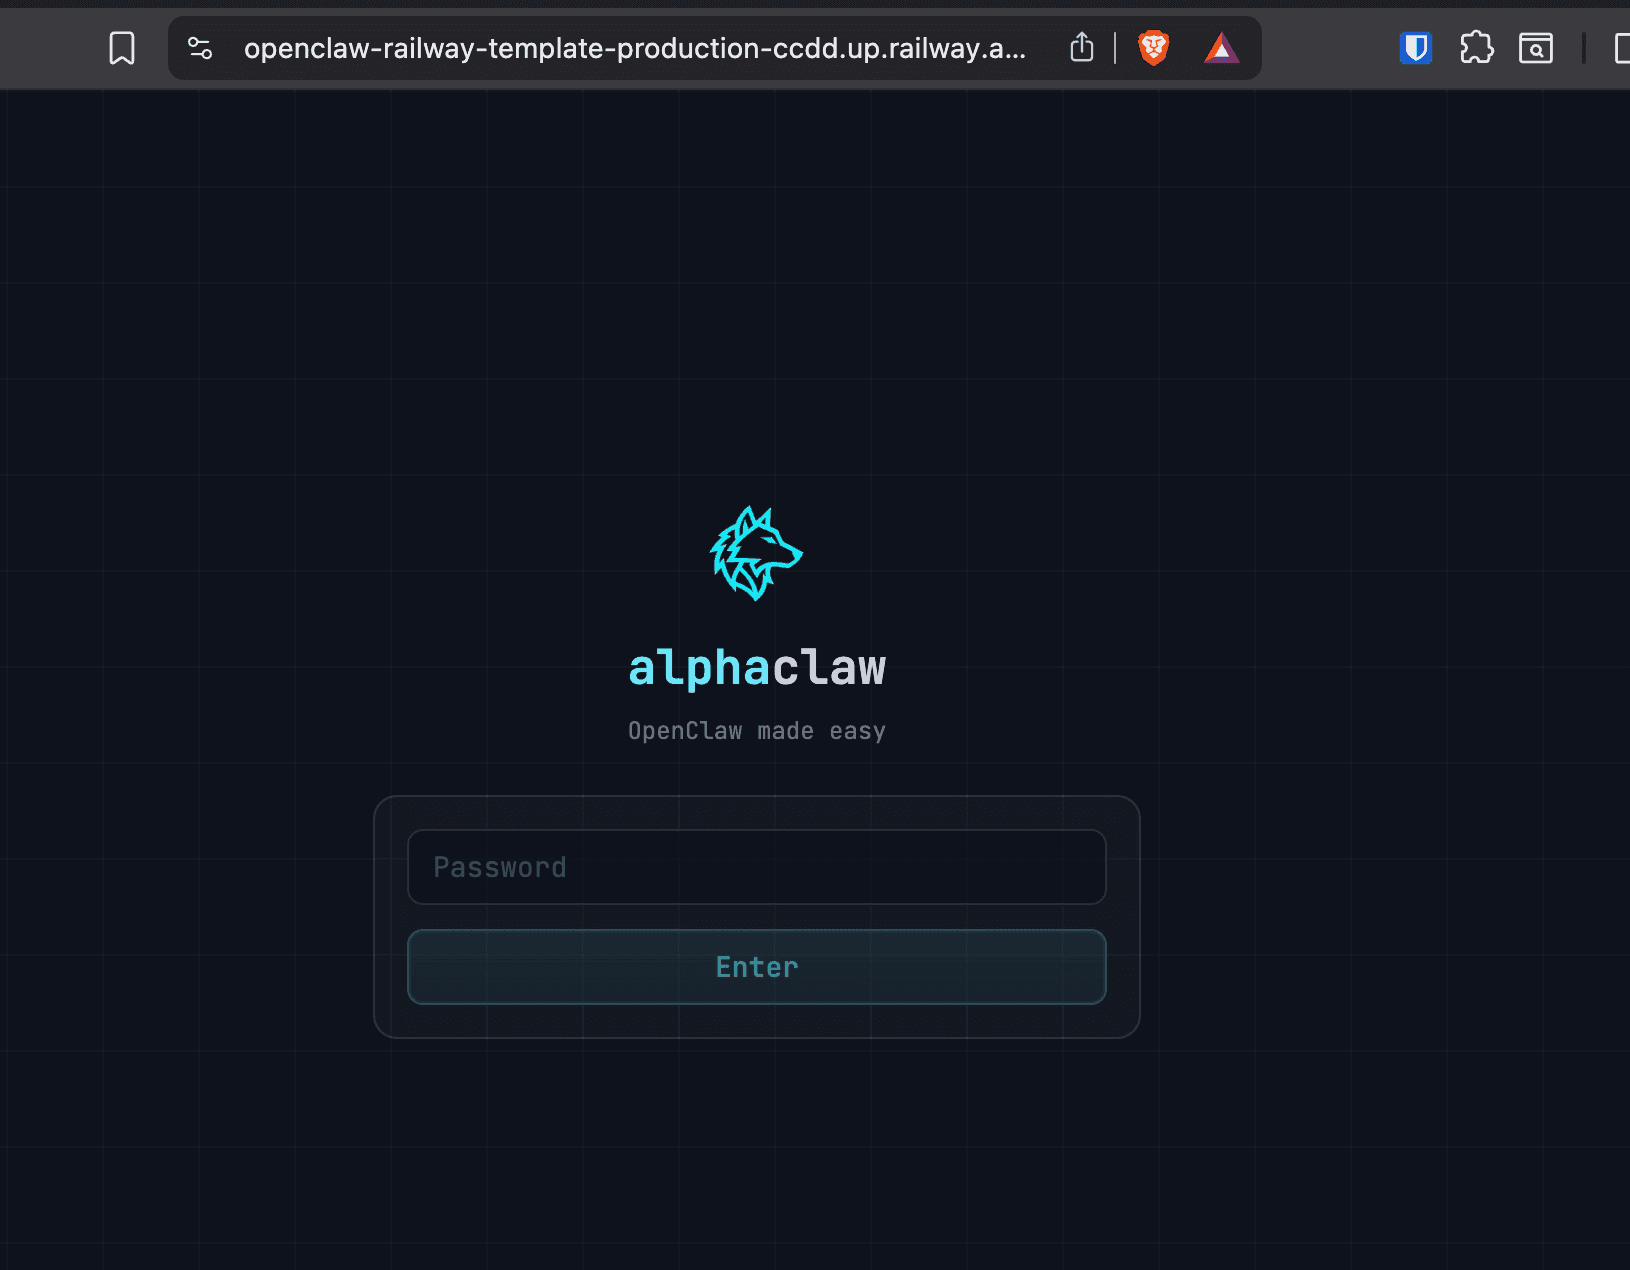
Navigate to Settings of the Railway deployment, and copy the URL that is under the Networking section (in the screenshot
openclaw-railway-template-production-ccdd.up.railway.app). This is your URL to access the machine. Then, open new tab to go to that page.
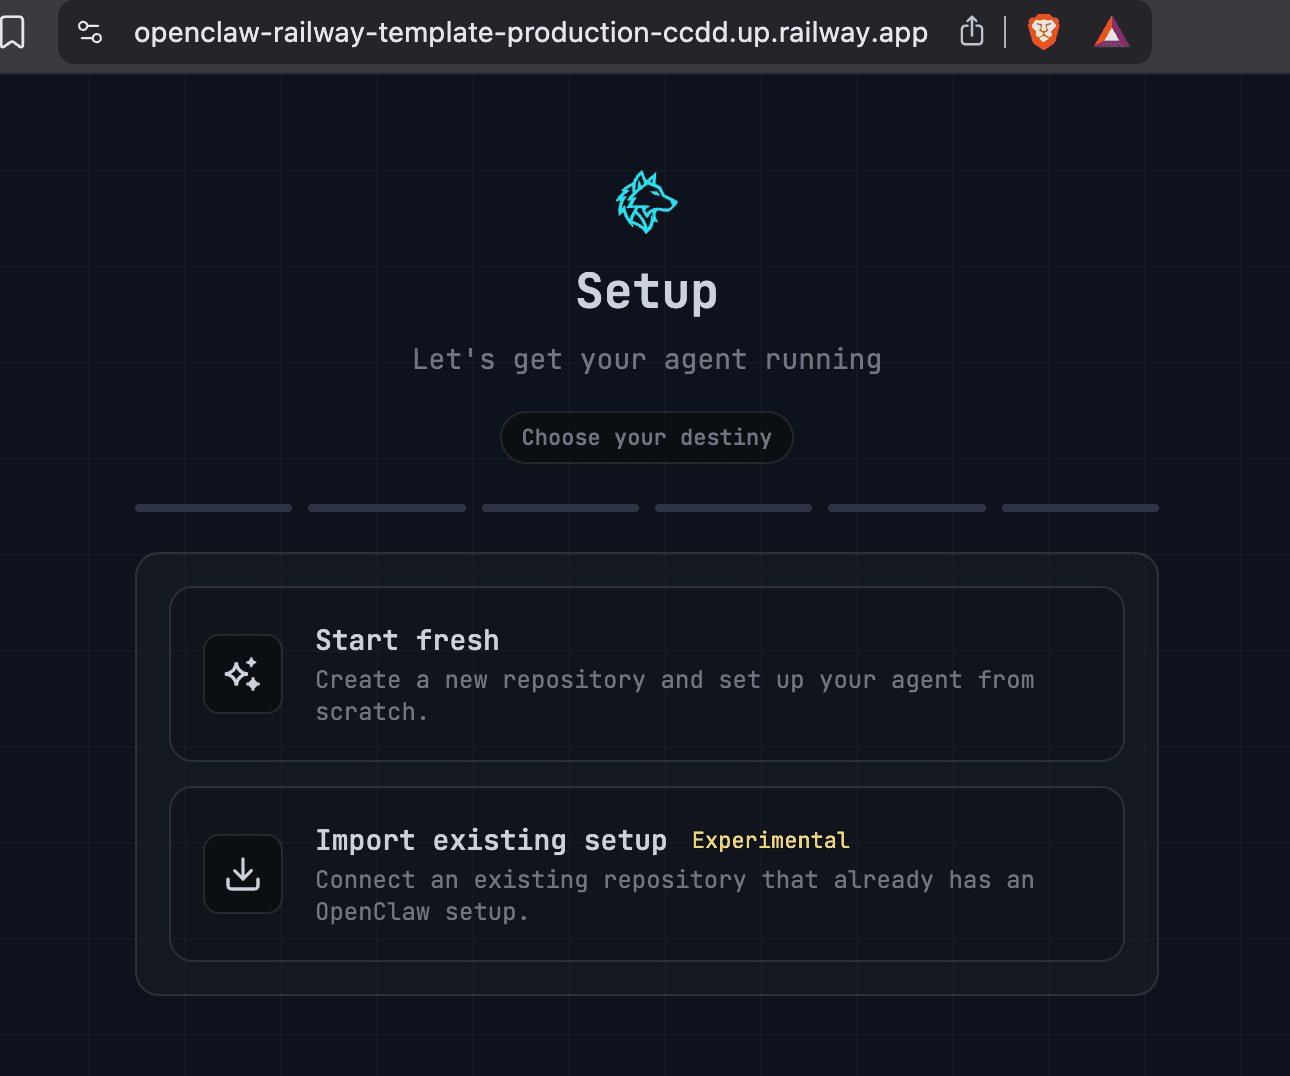
If you see below, you are good so far! Enter password, and then click Start Fresh
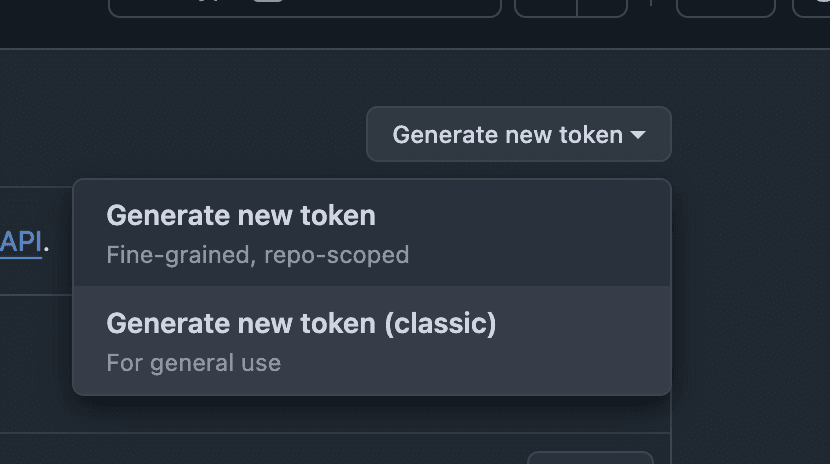
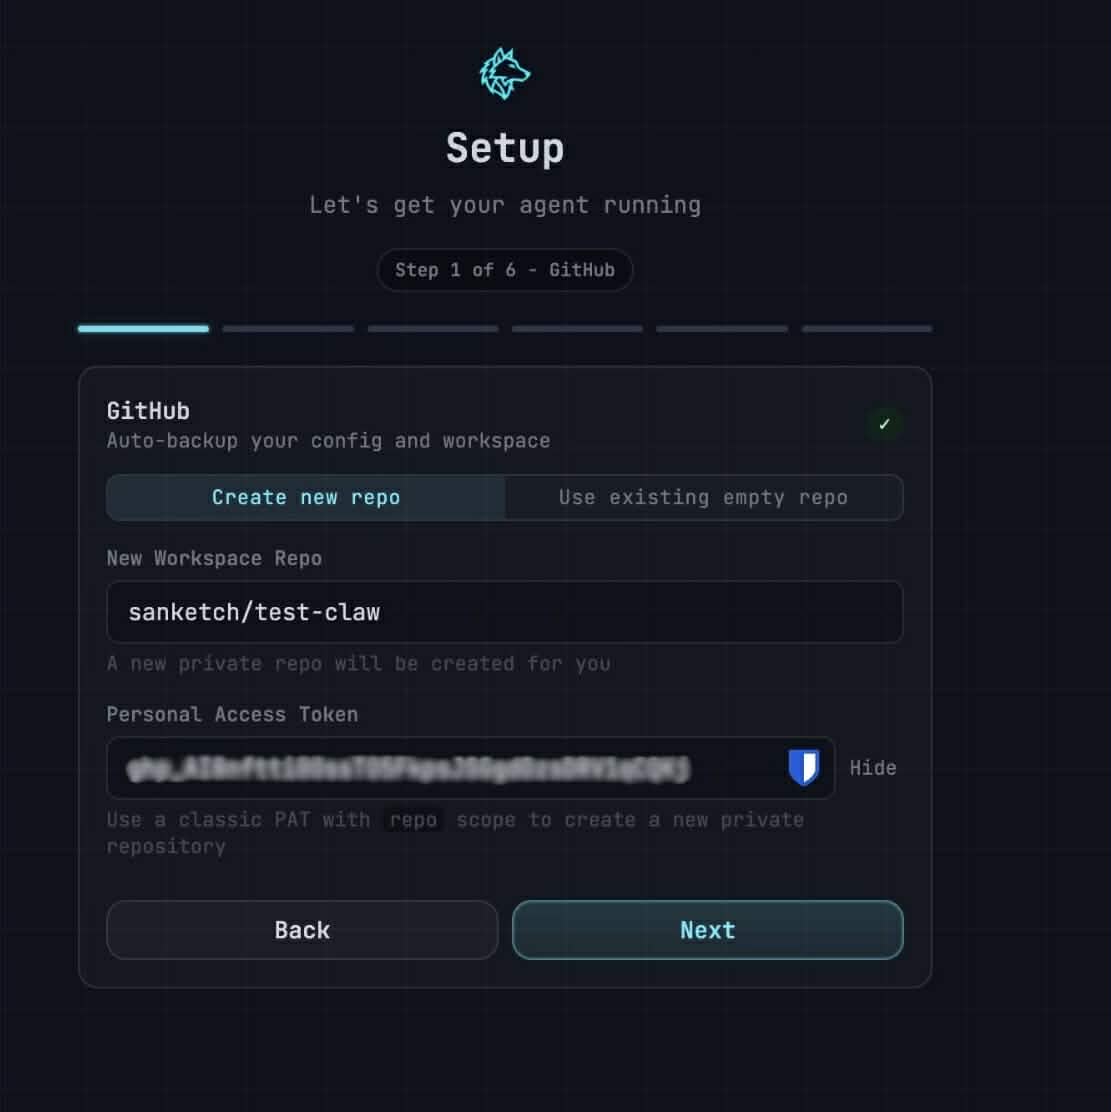
Now head to Github Tokens page to create a personal token https://github.com/settings/tokens
Create a new Token - Click Generate New Token (Classic) and copy that code
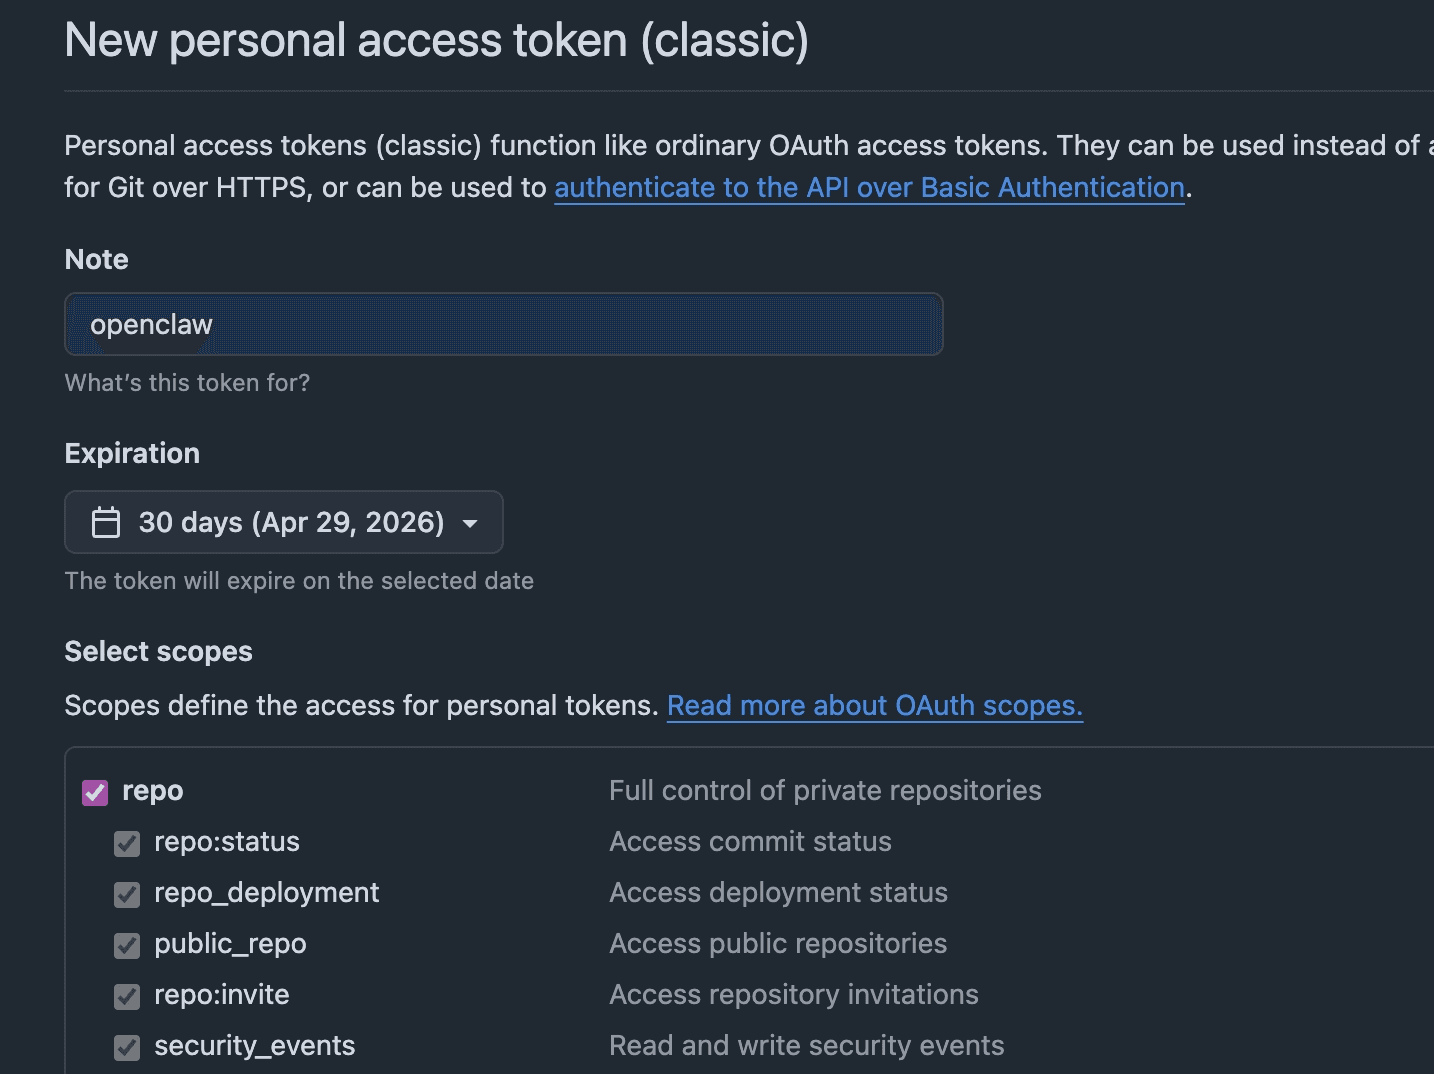
For the Note field, any name will do for your claw token.
Check "repo" then scroll to the bottom to click "Generate Token".
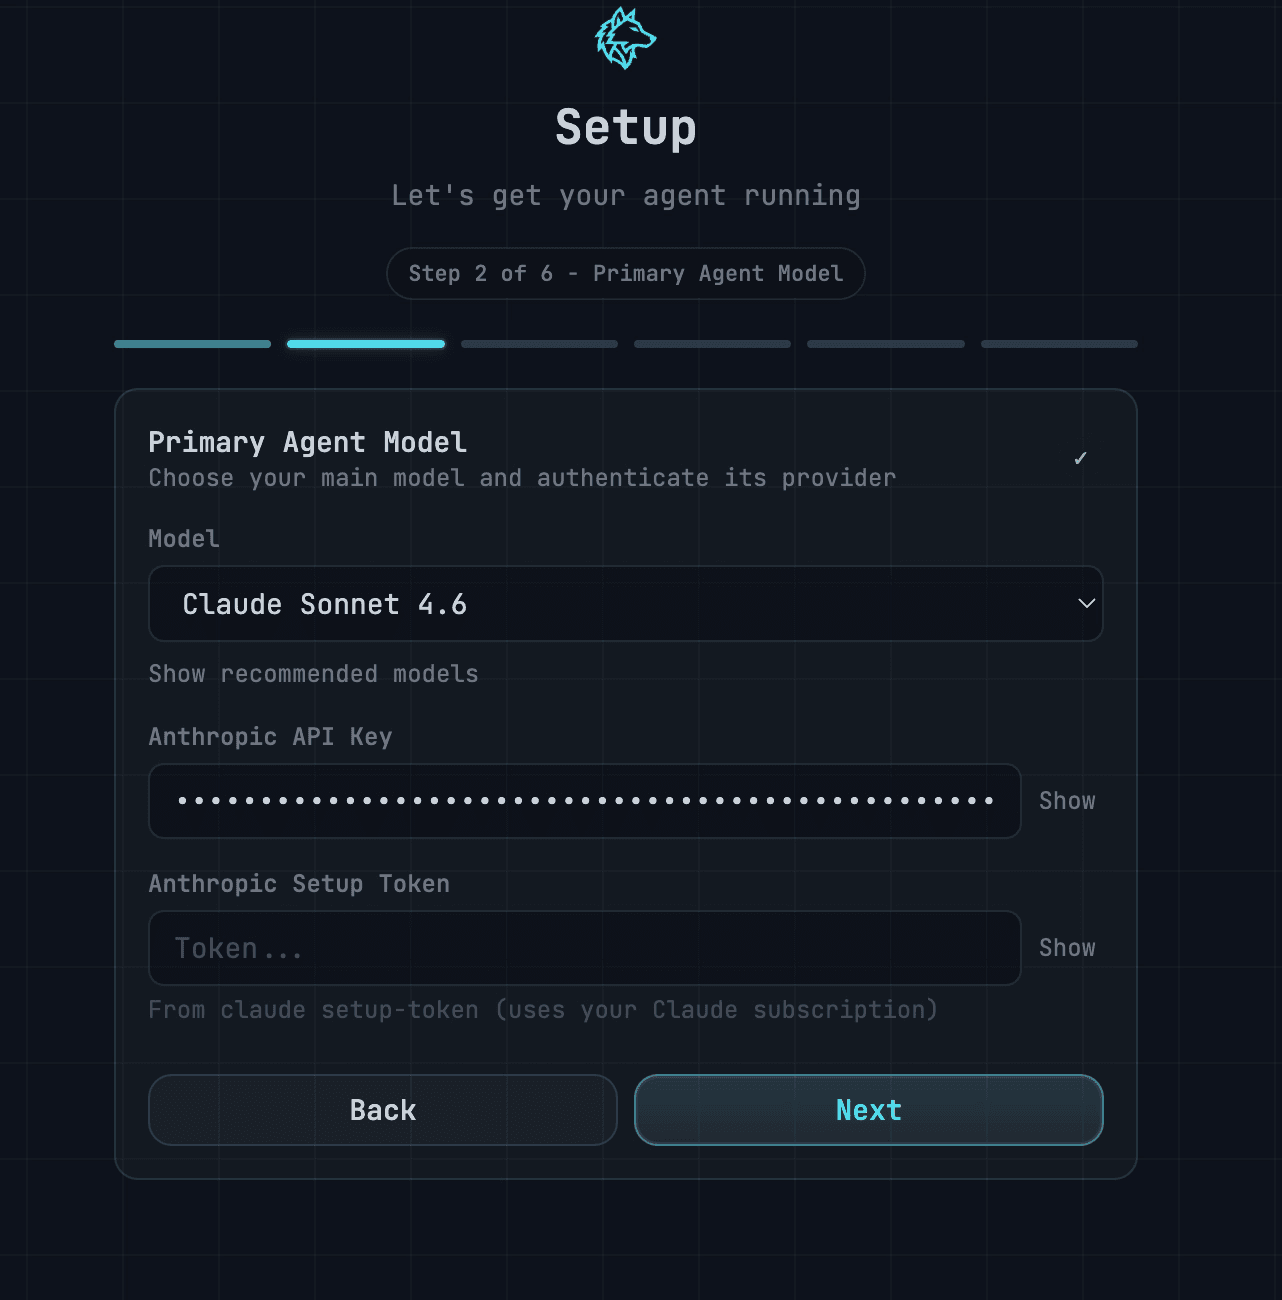
Now Enter api key for anthropic
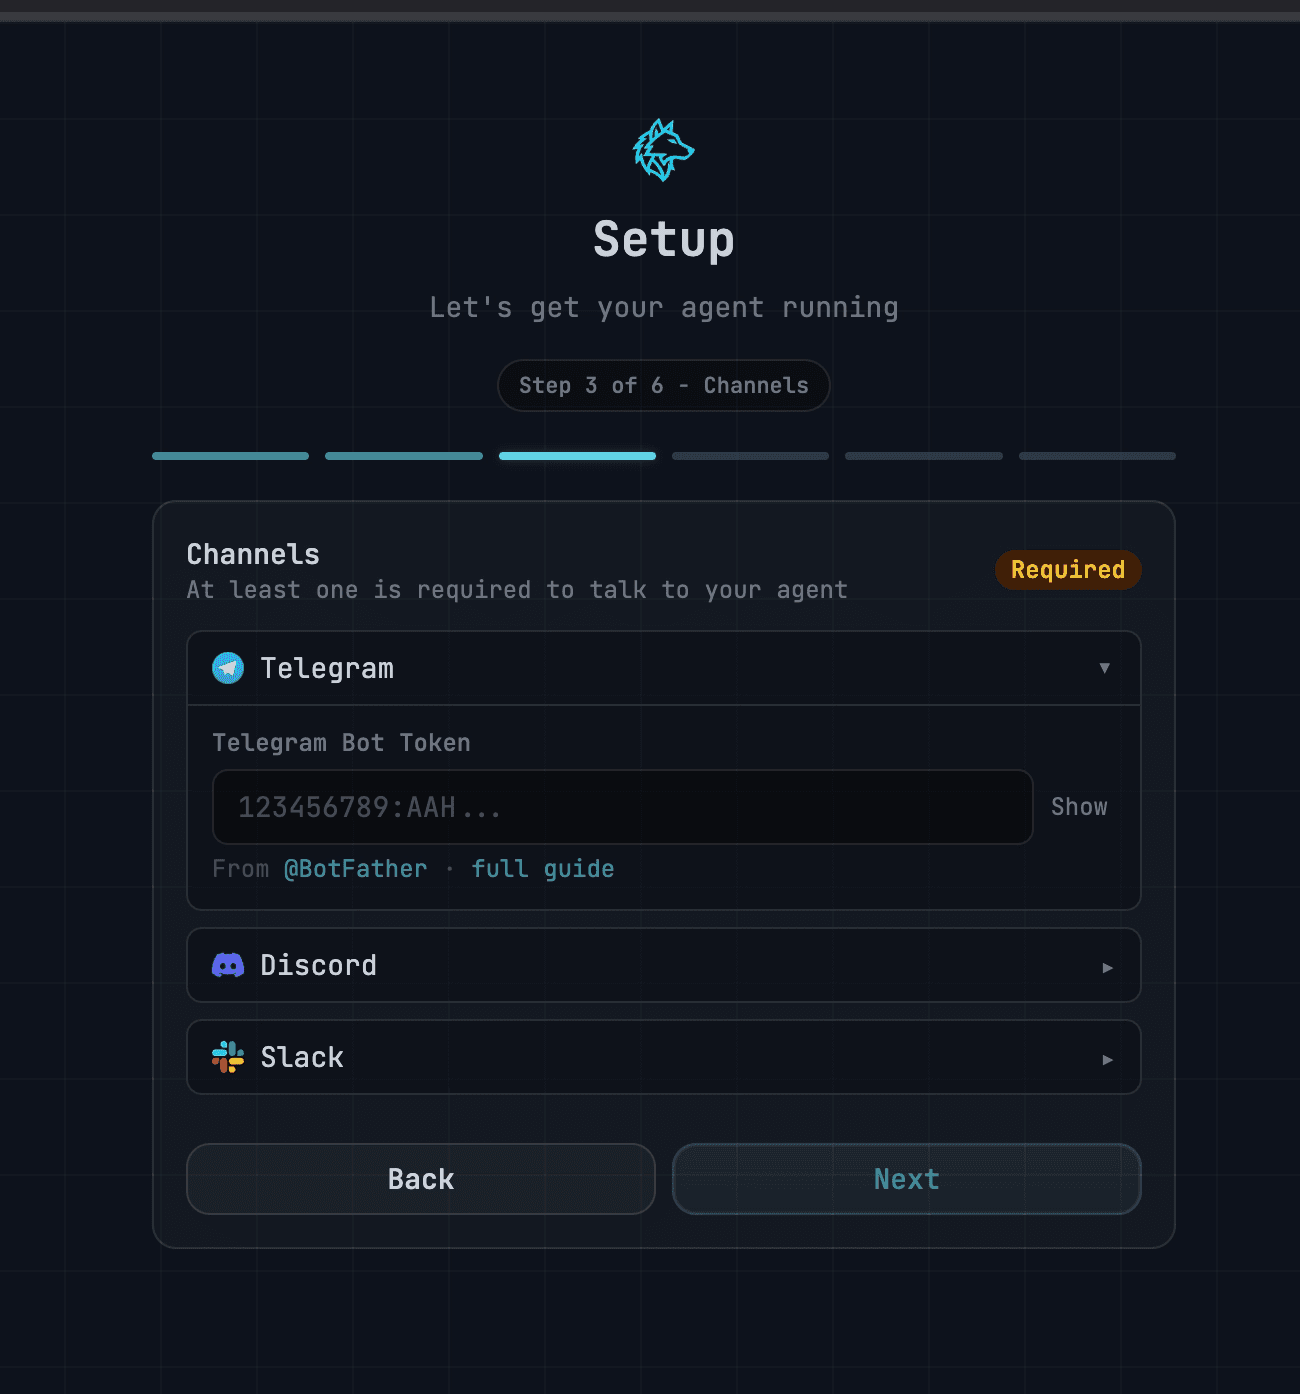
Now pick Telegram or Slack. Telegram is a bit easier, but we’ll go with Slack.
Slack Setup
Lets setup Slack bot now, and then we can get the appropriate tokens to add.
Goto Build Apps page in Slack: https://api.slack.com/apps/
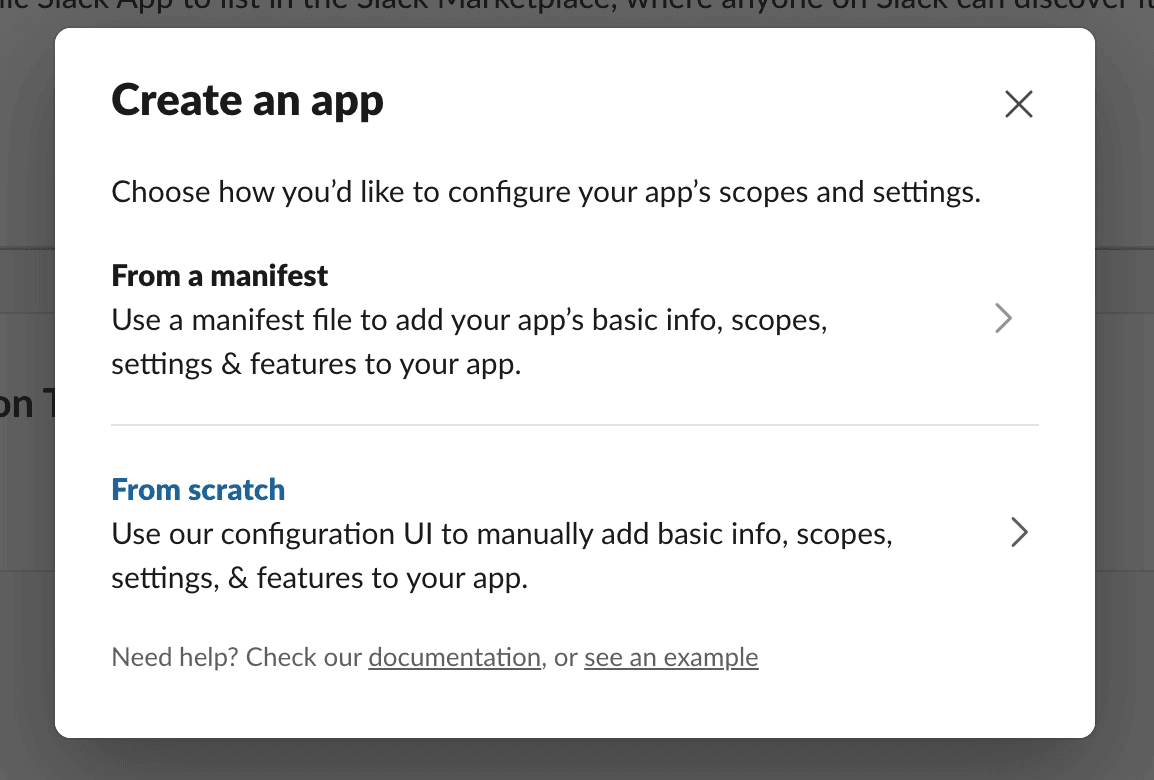
Click Create App Button → From Scratch
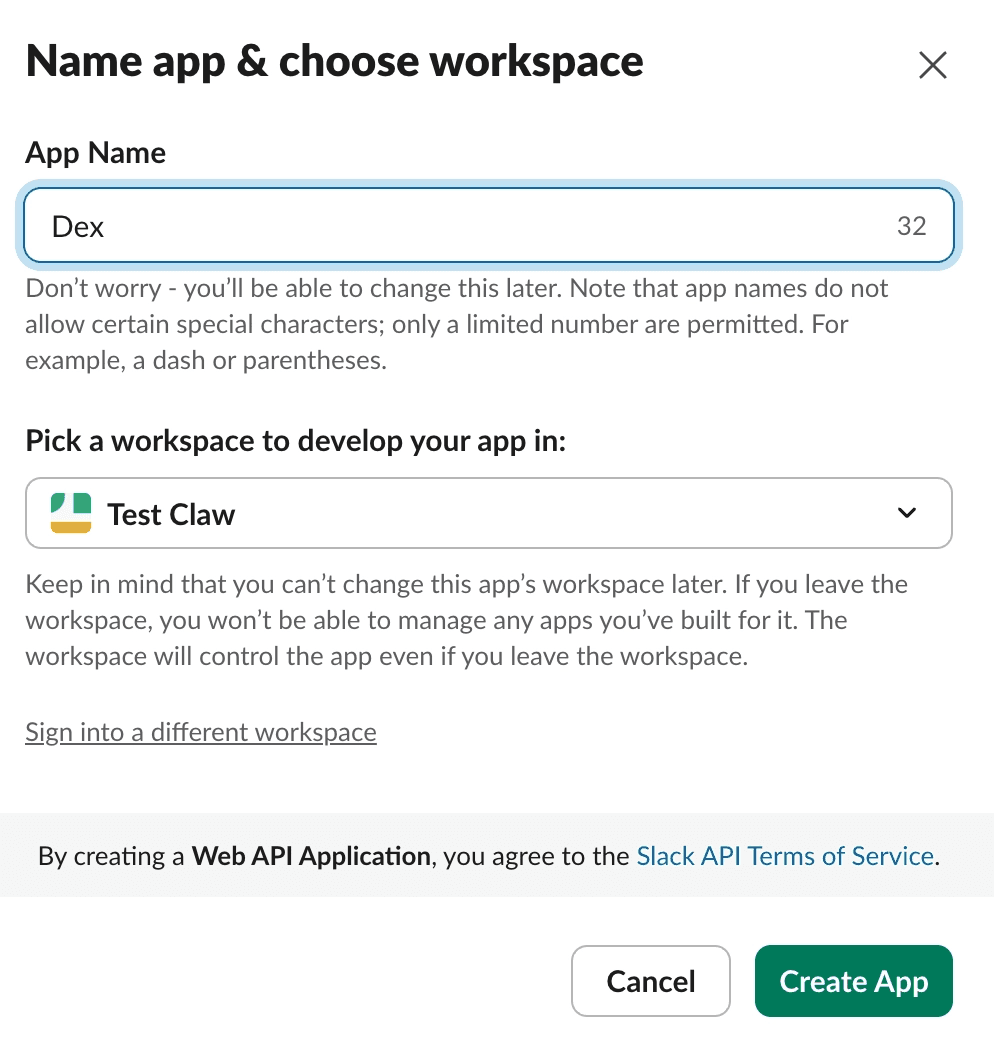
Name your ClawBot
Goto Oauth and Permissions section
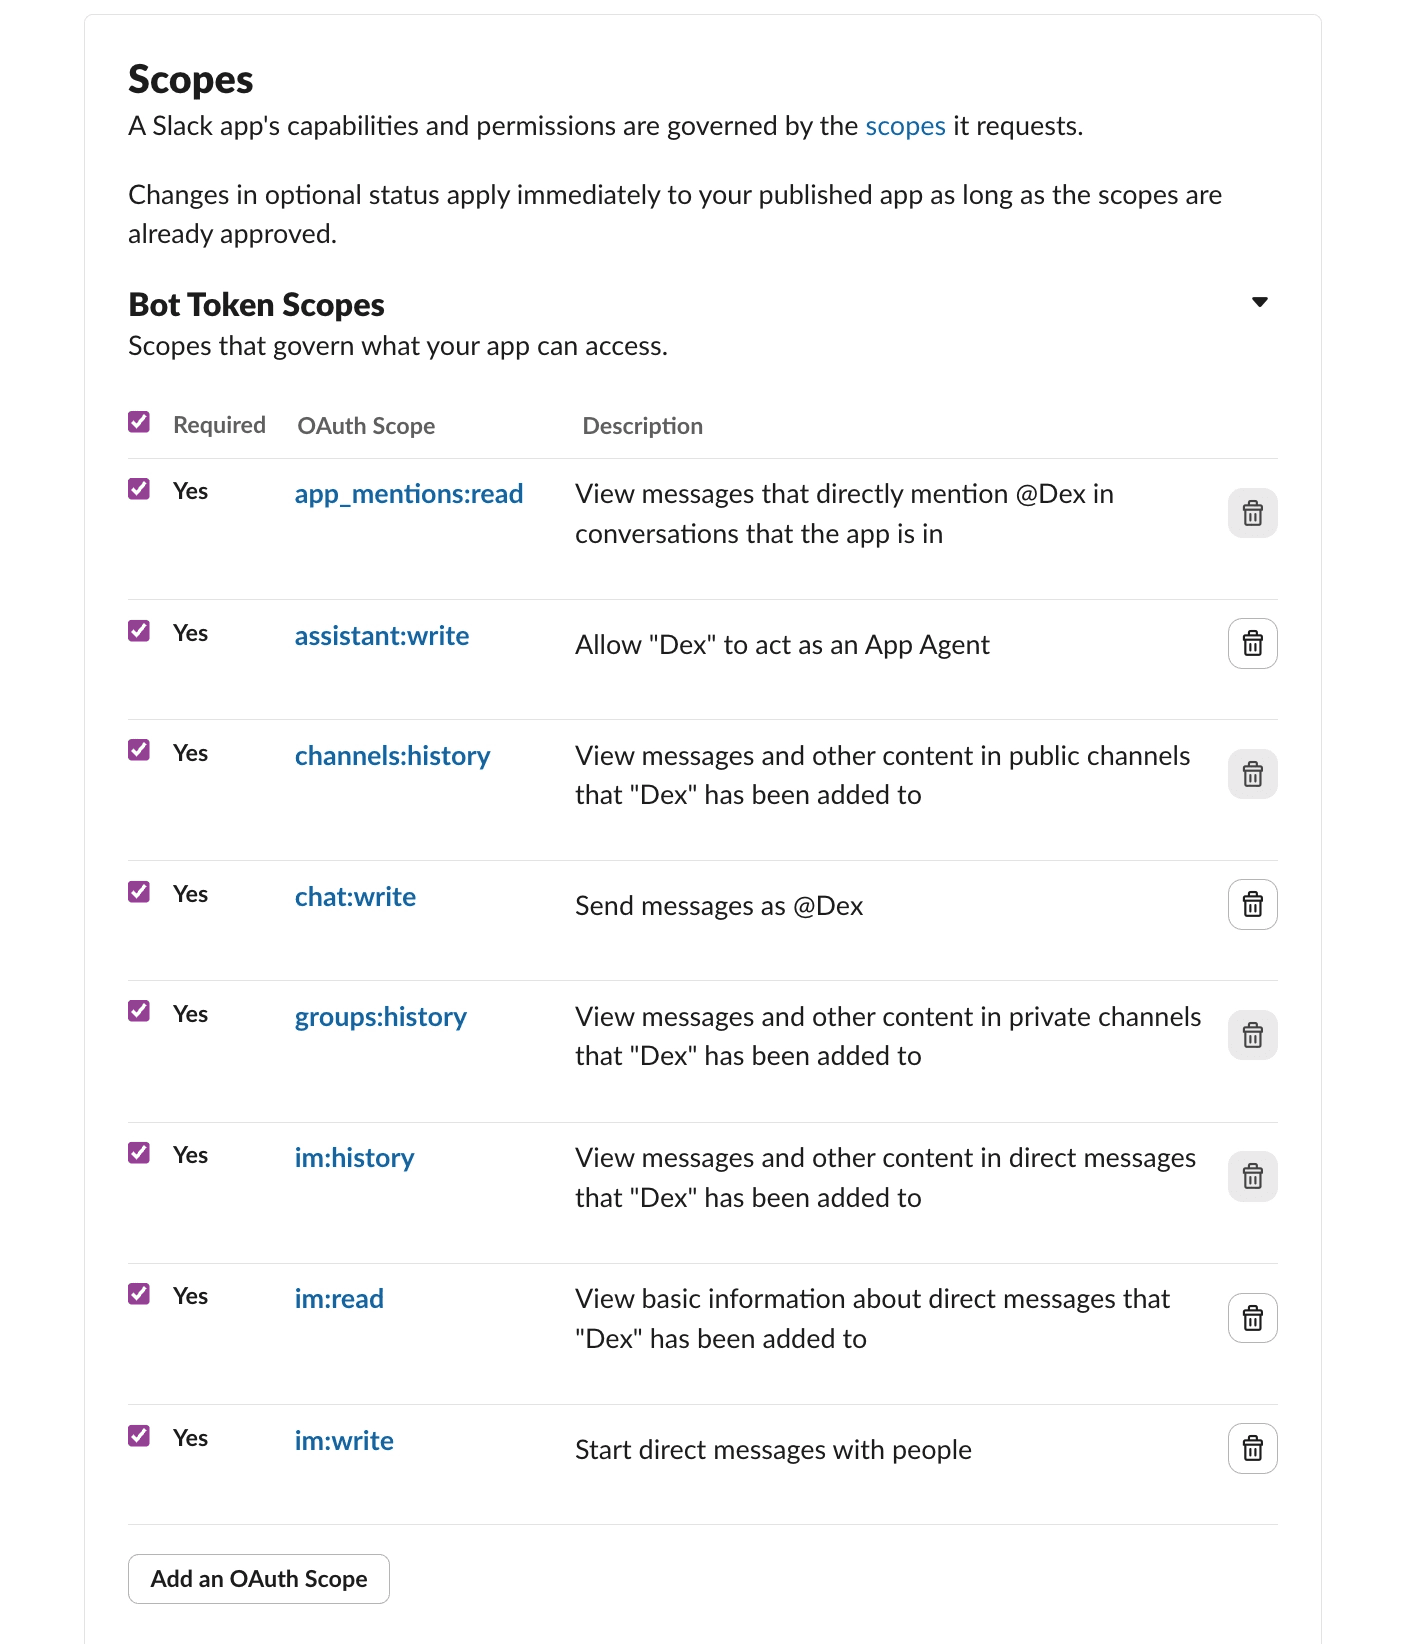
Add the following eight permission / oauth tokens.
app_mentions:read
assistant:write
channels:history
chat:write
groups:history
im:history
im:read
im:write
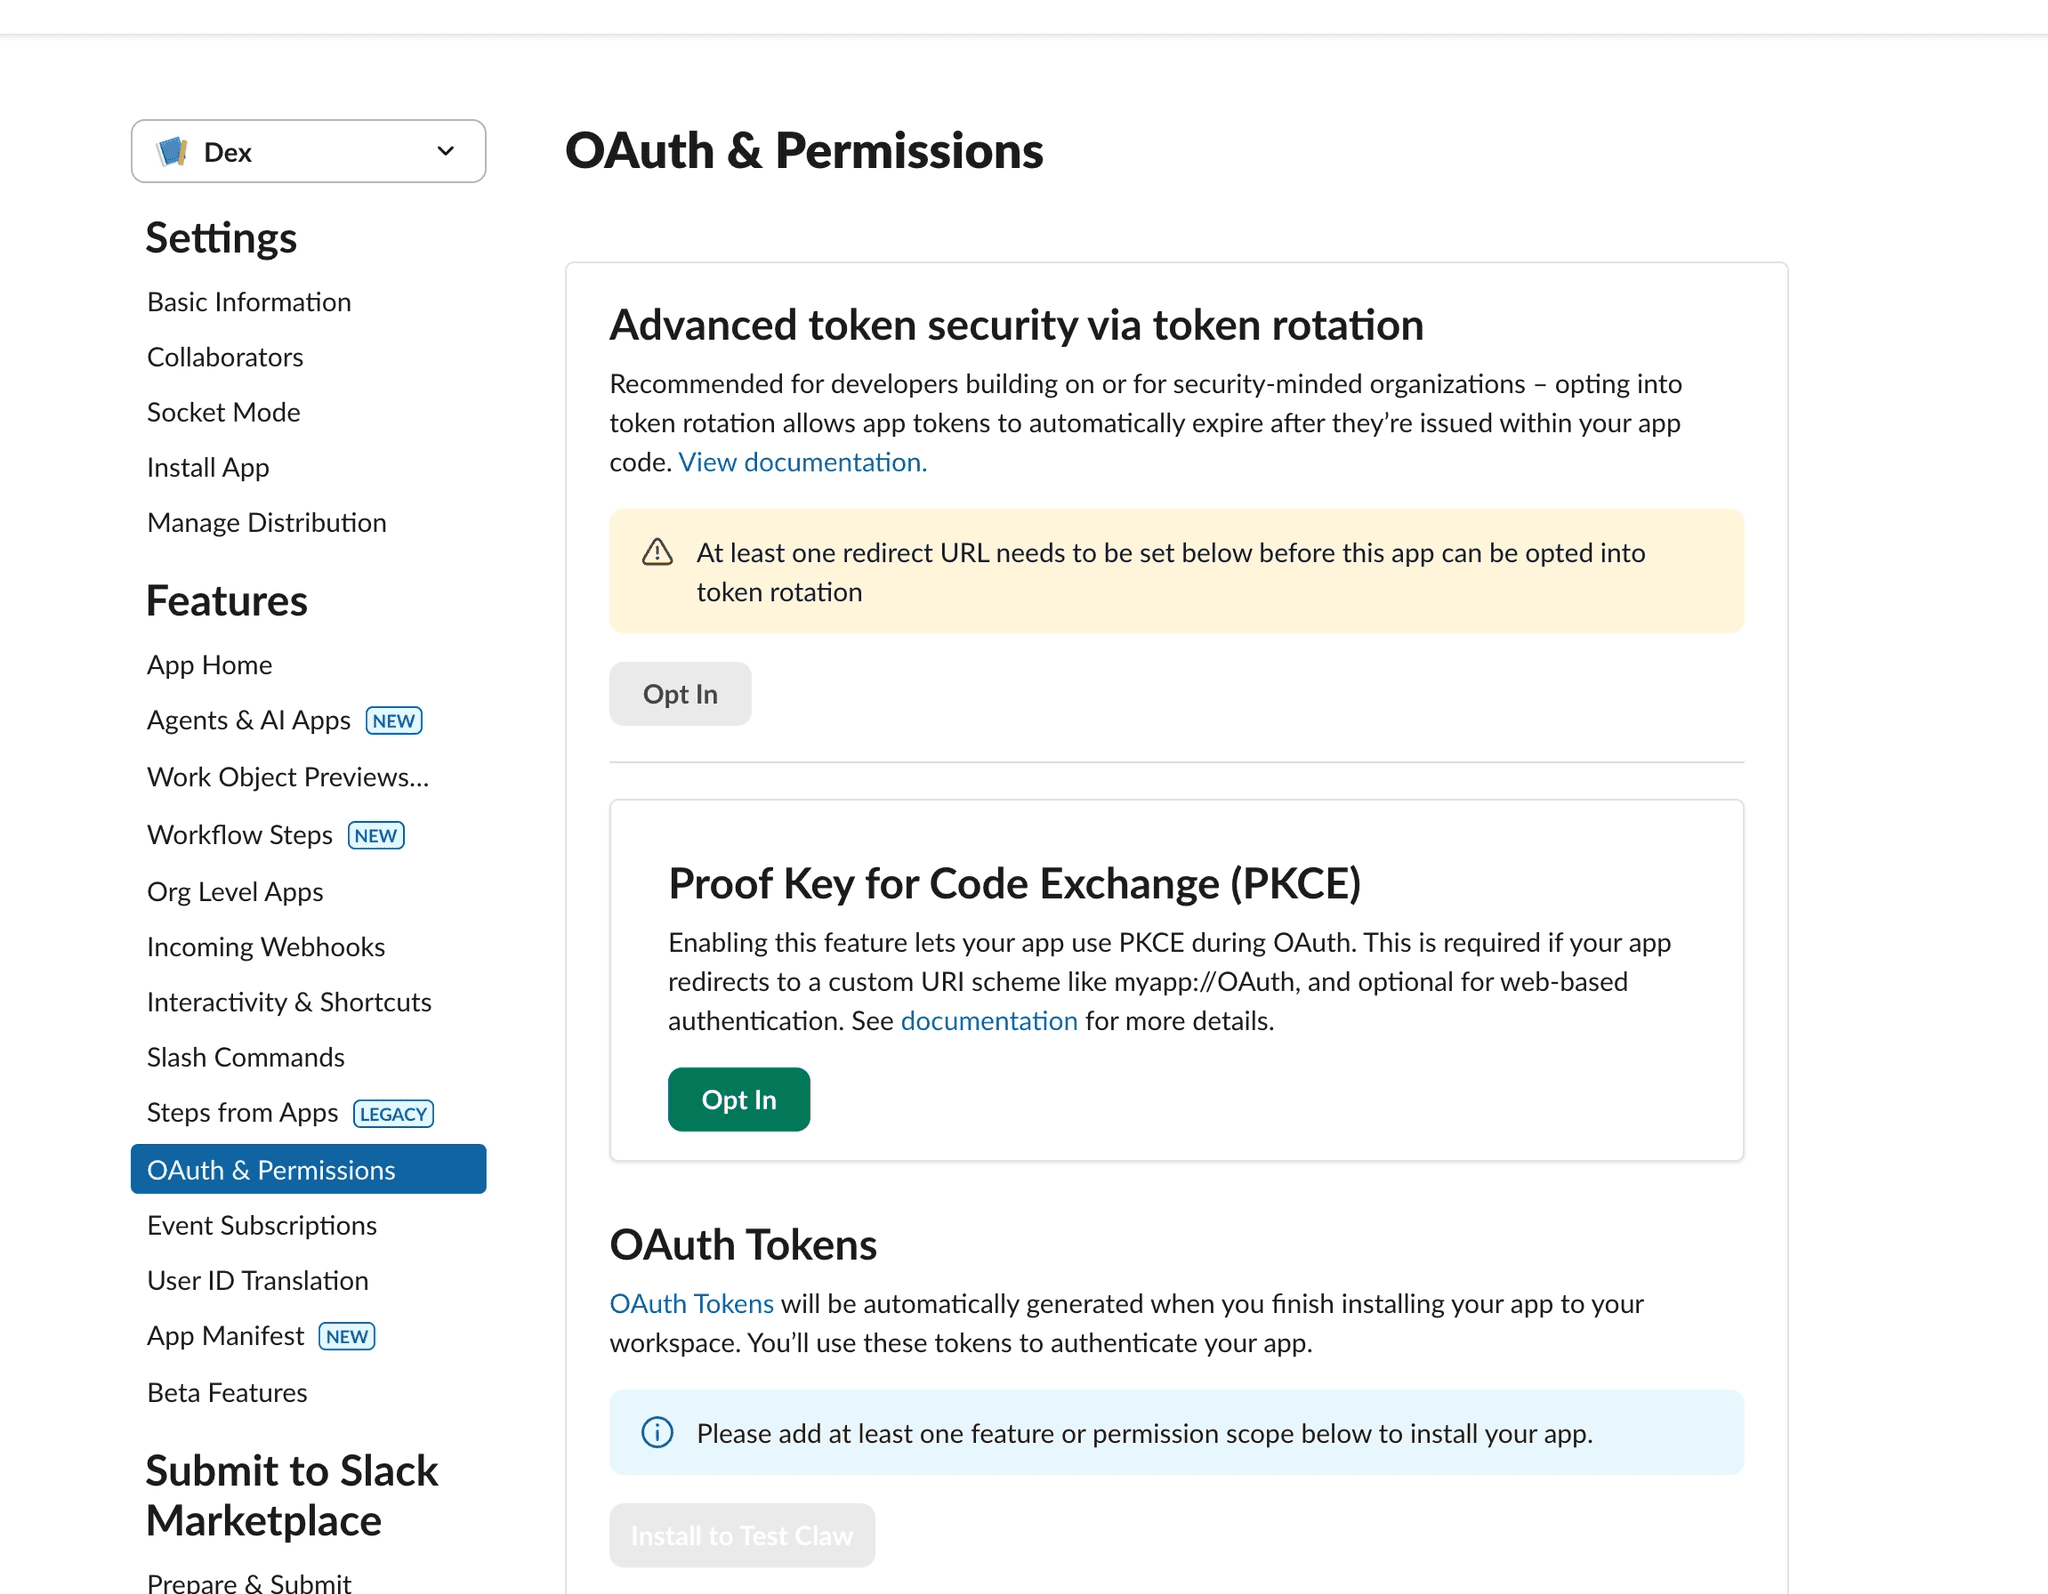
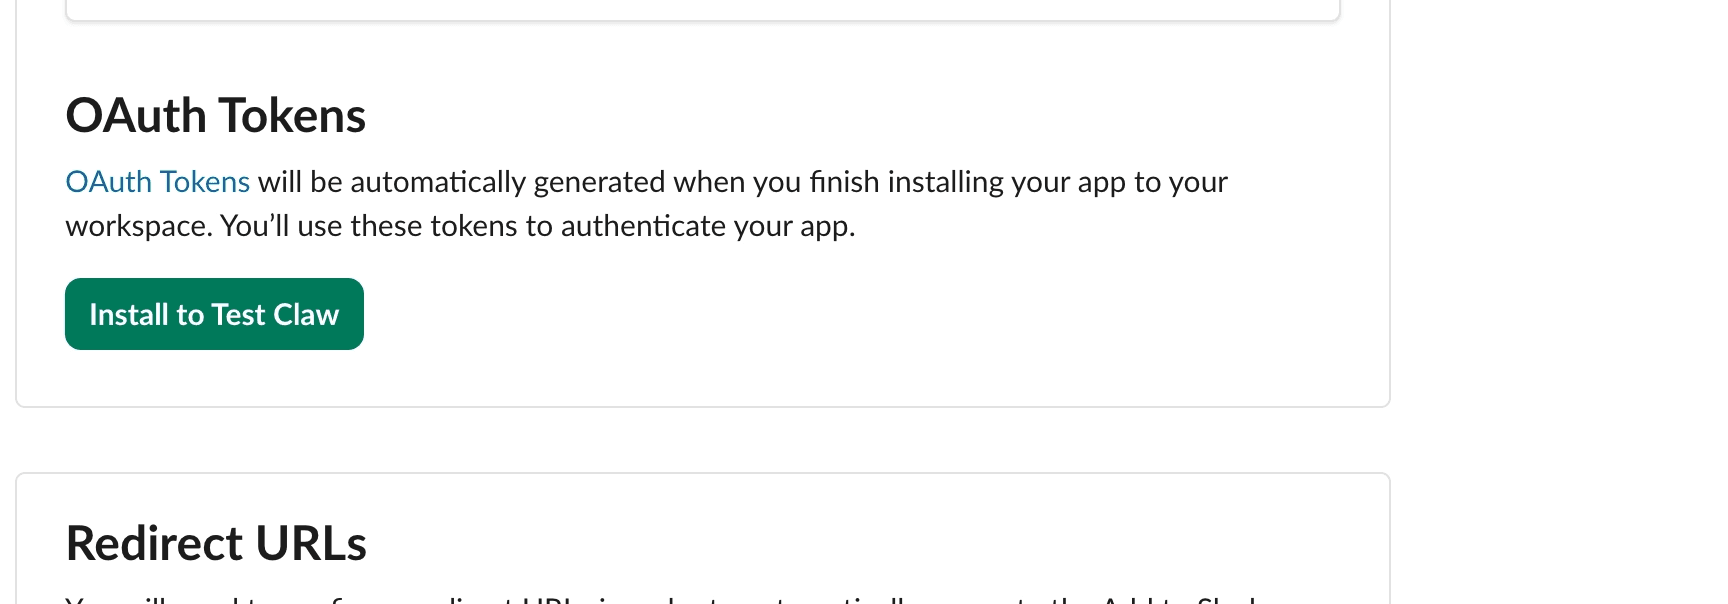
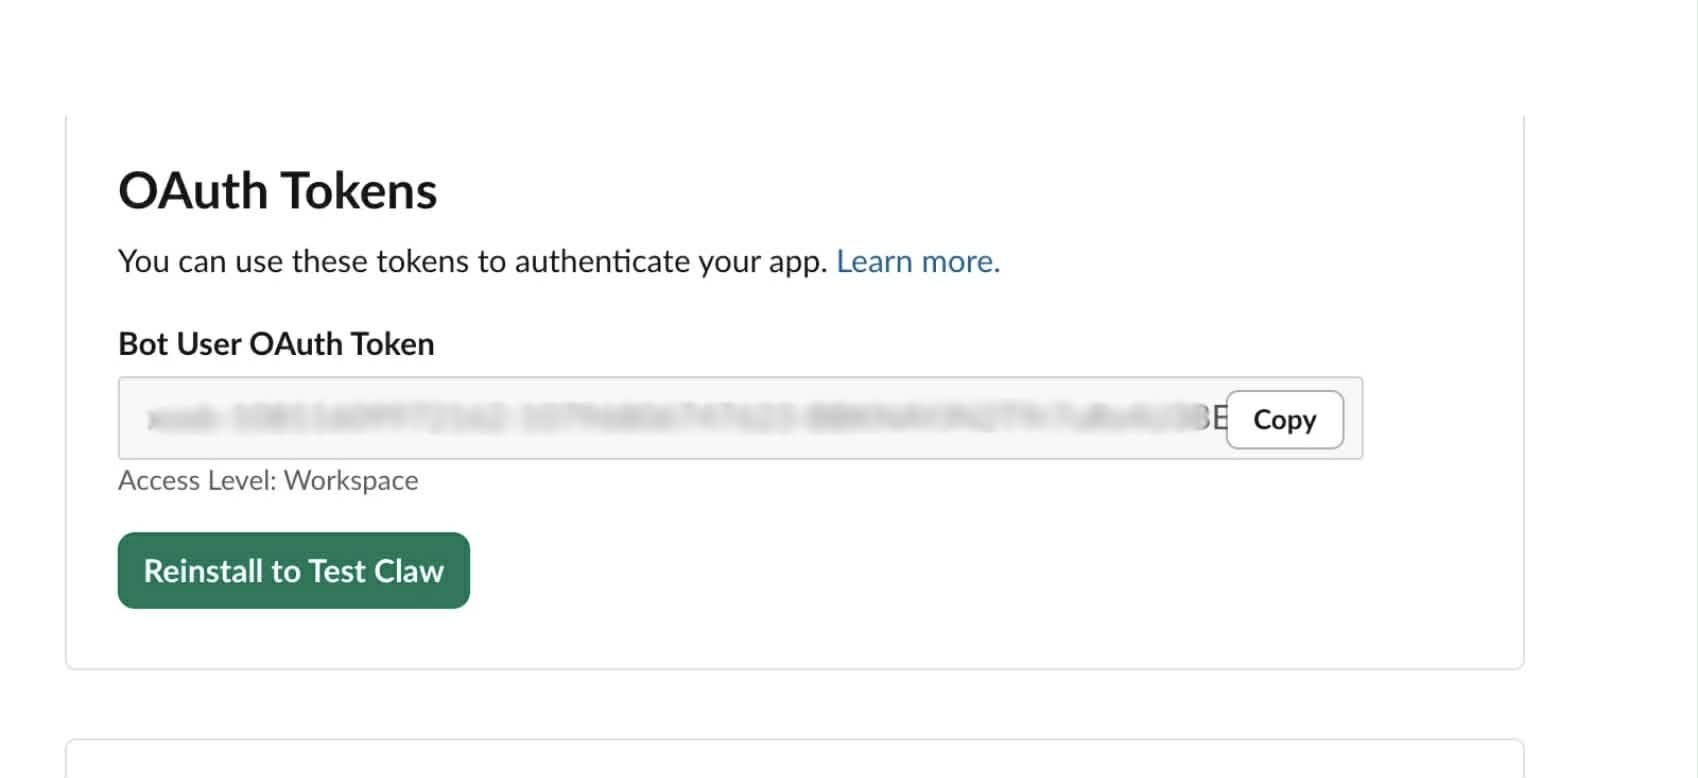
Install App by Scrolling up
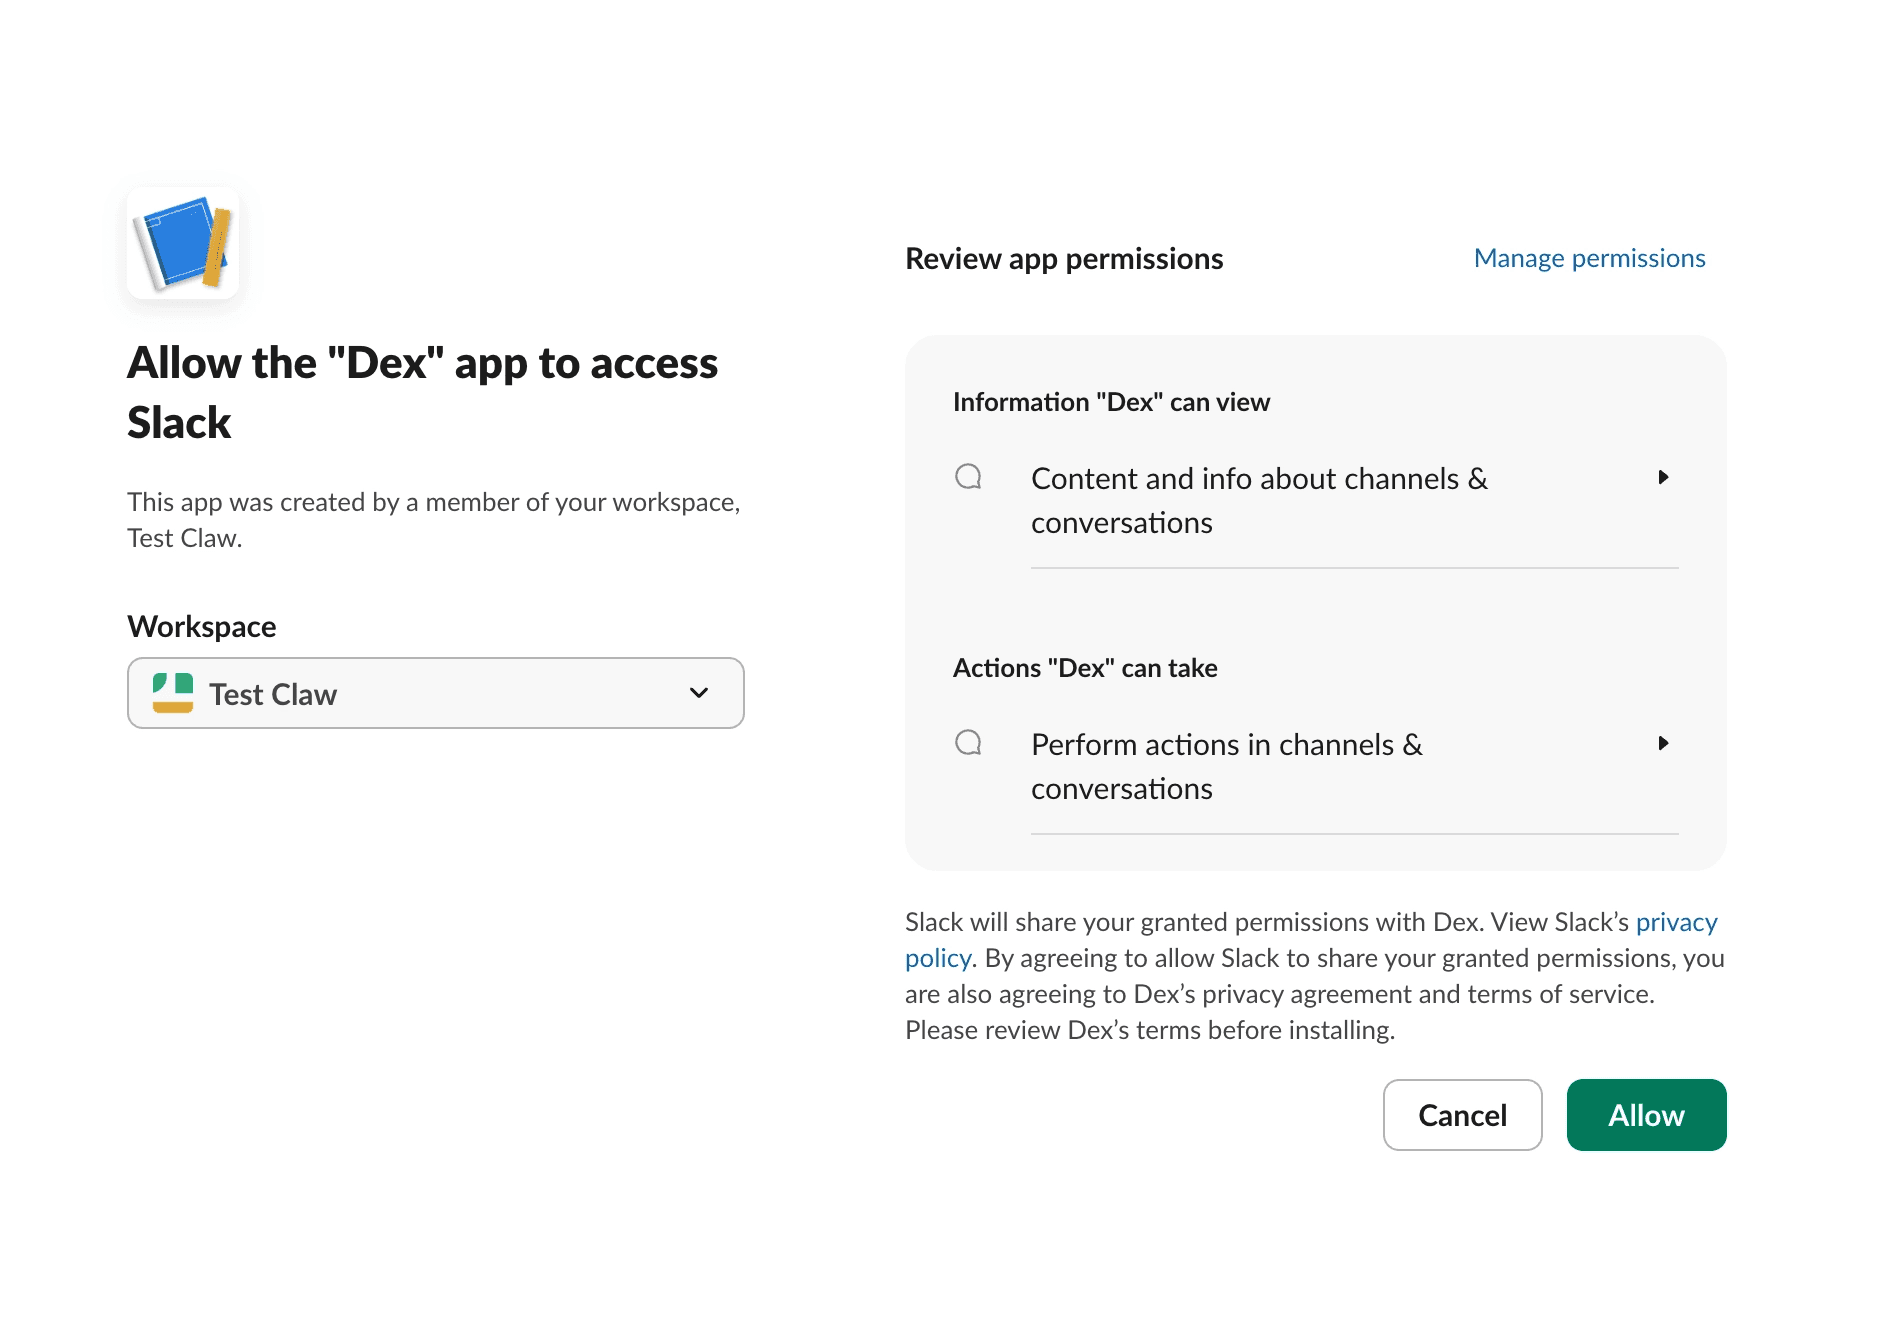
Copy the Bot token you see there
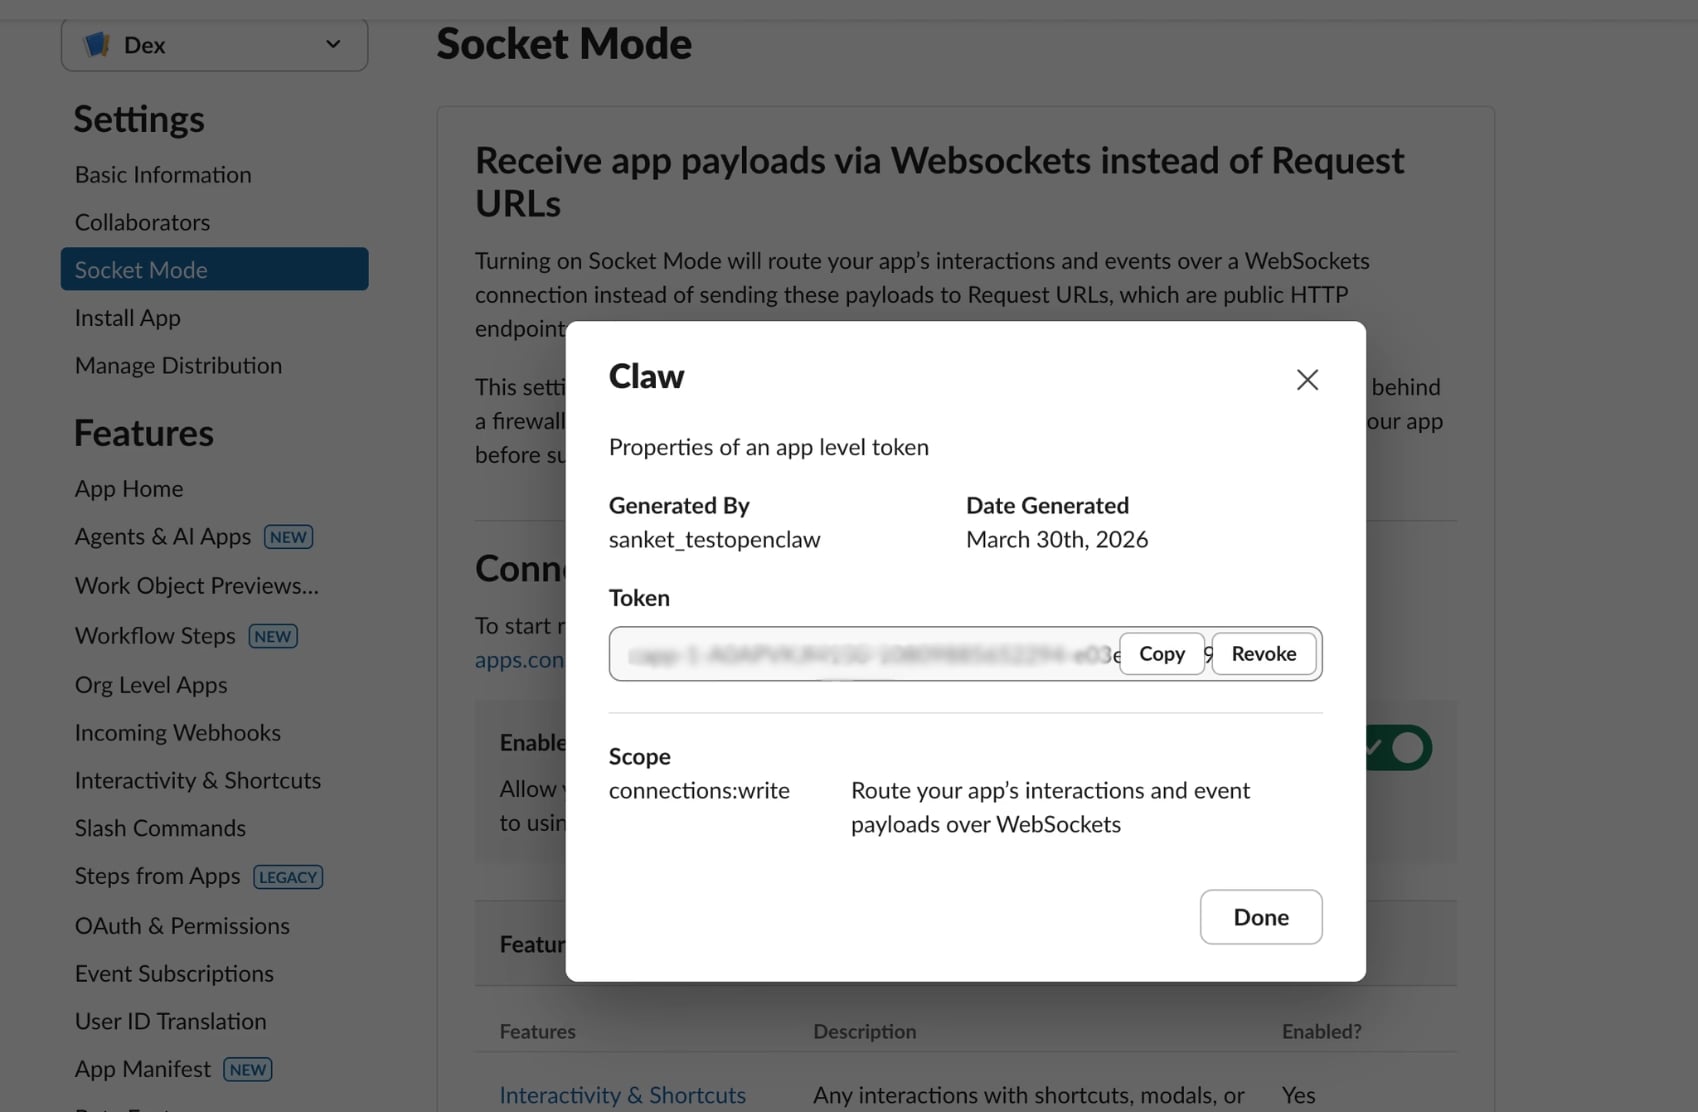
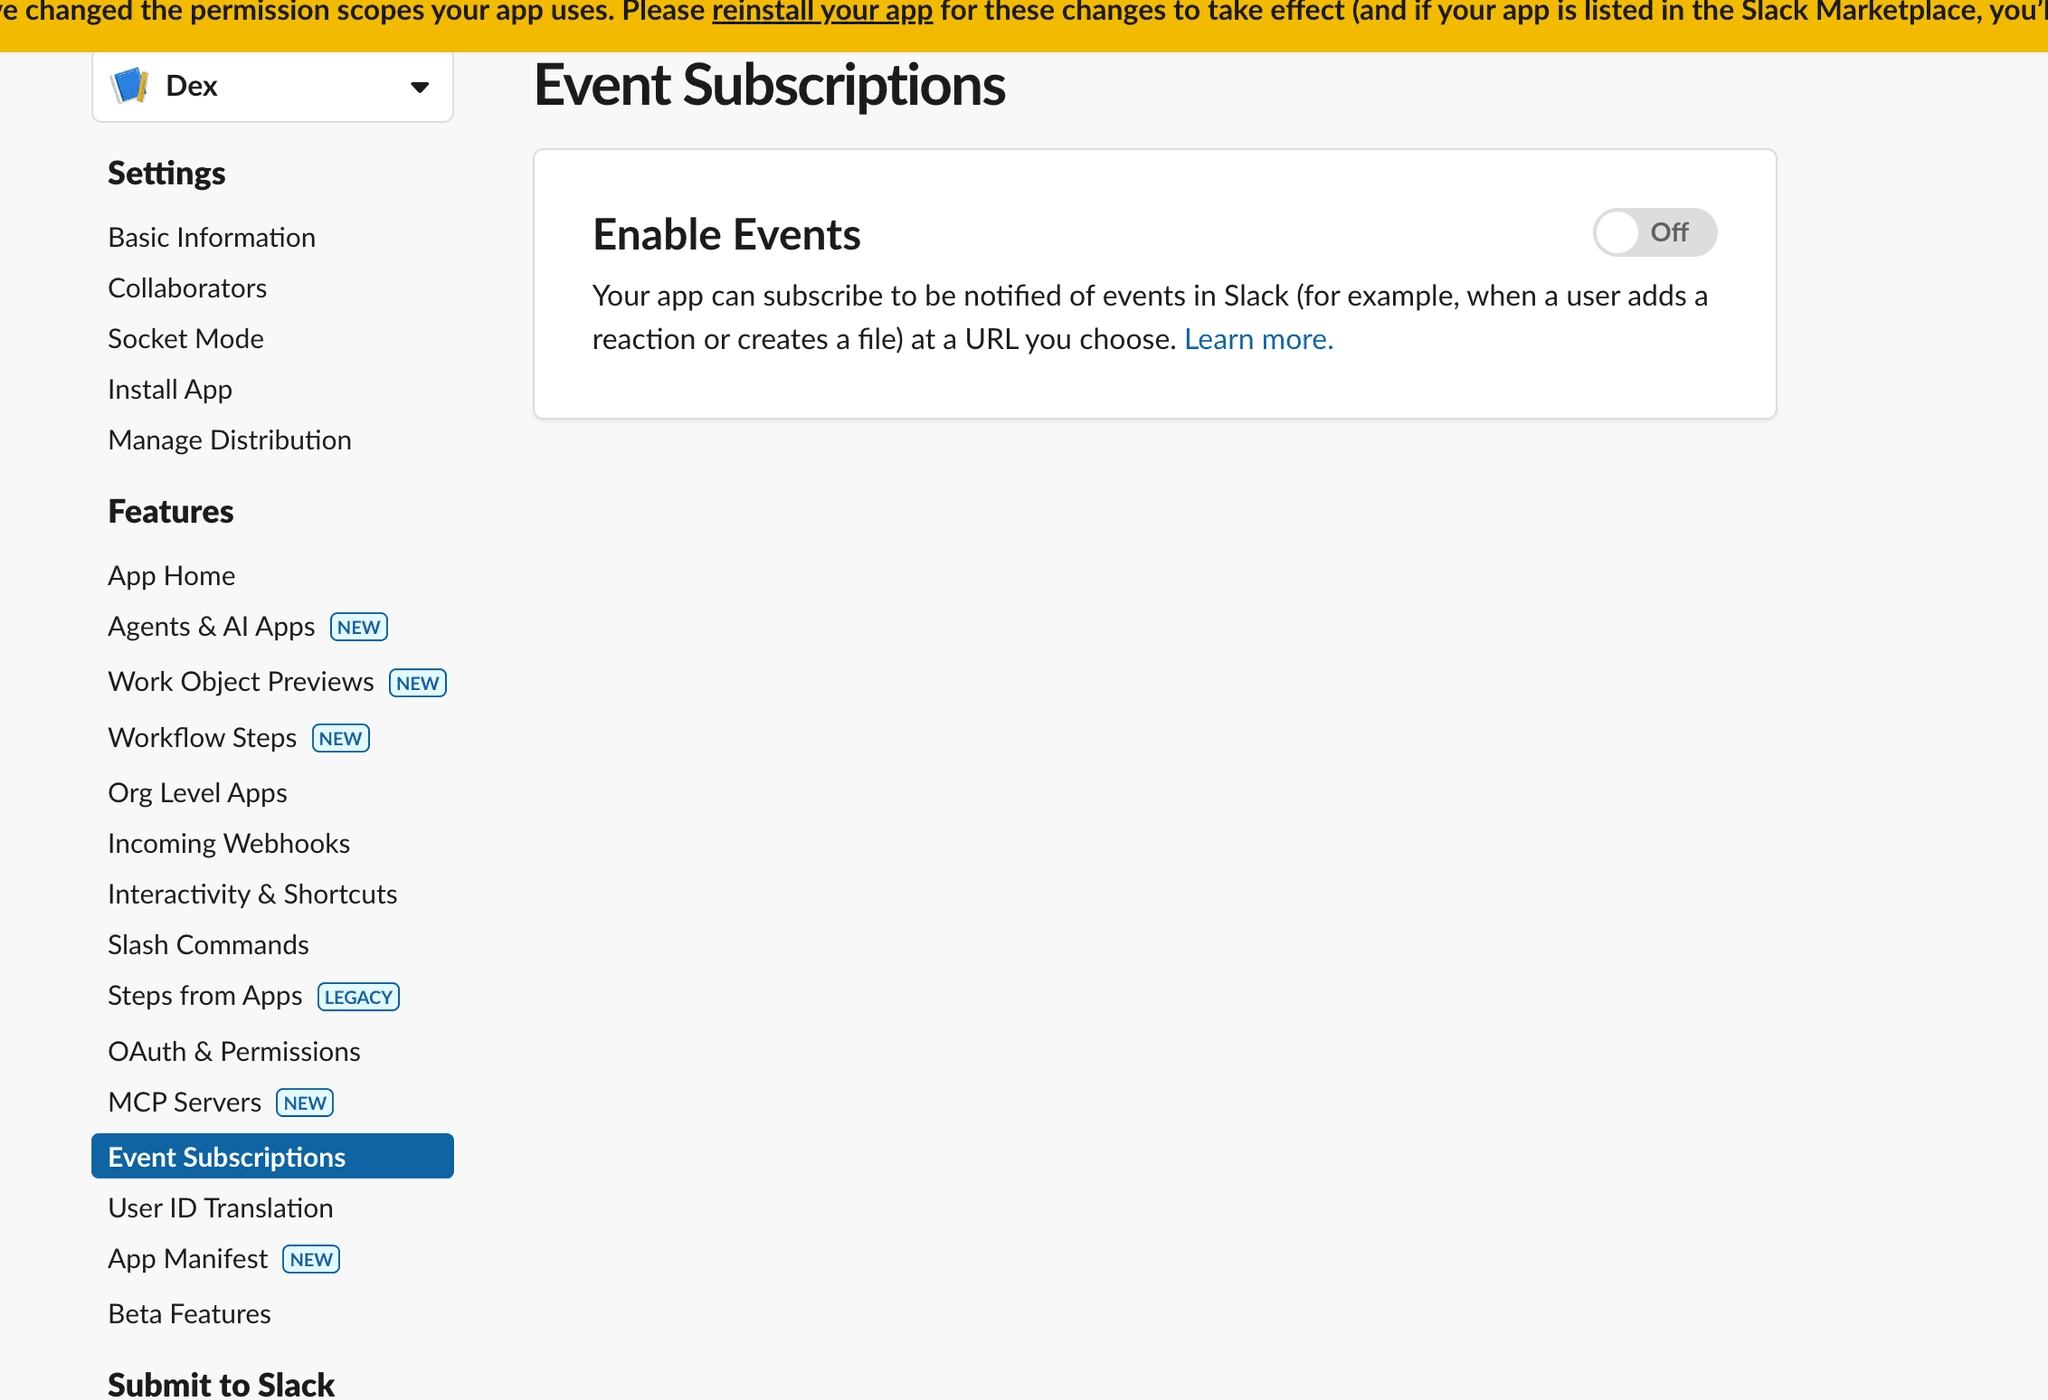
Get the Socket mode Token From Settings → Socket Mode.
Enter a name and click Generate
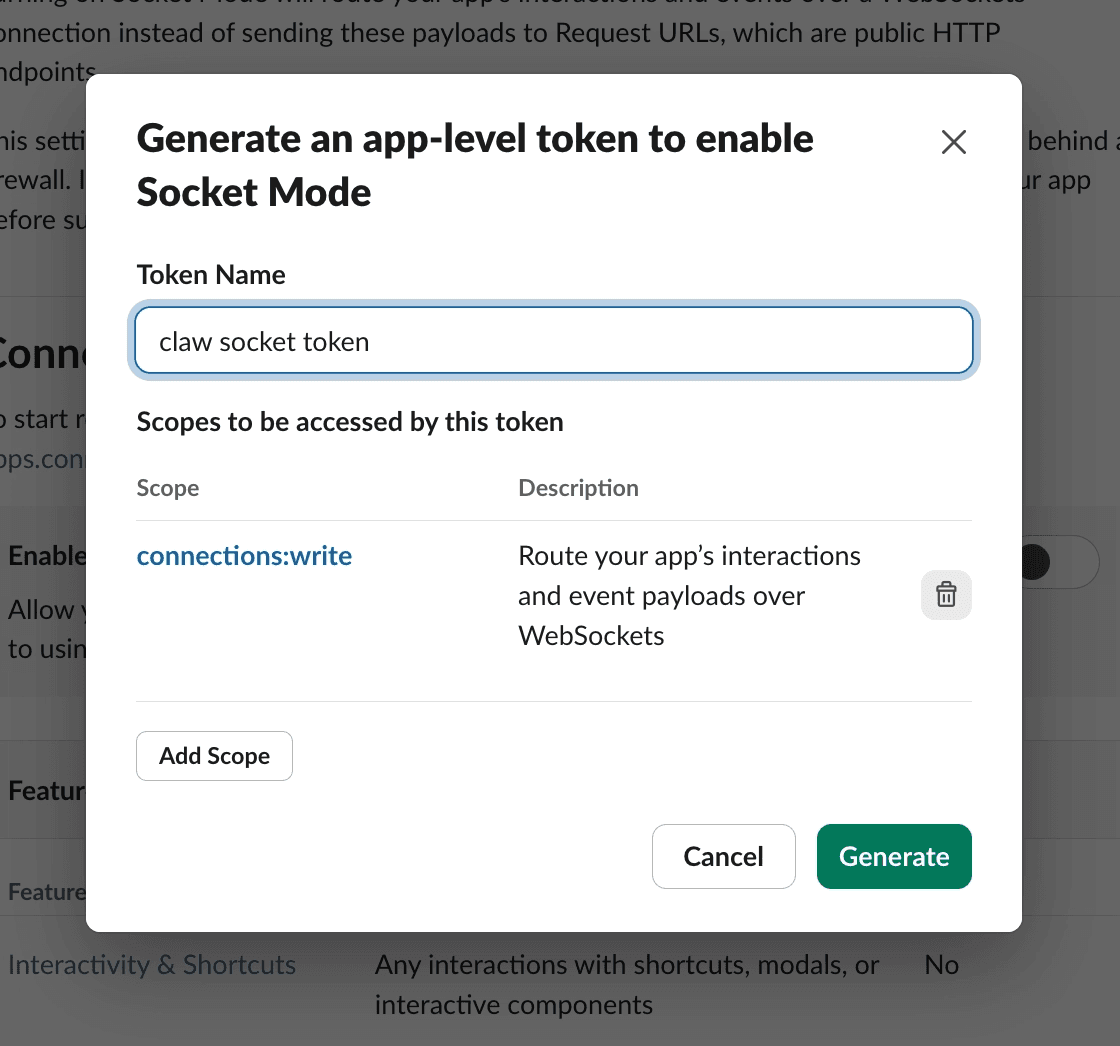
Copy and save this as well:
. Additionally head to Event Subscriptions then Enable Events.
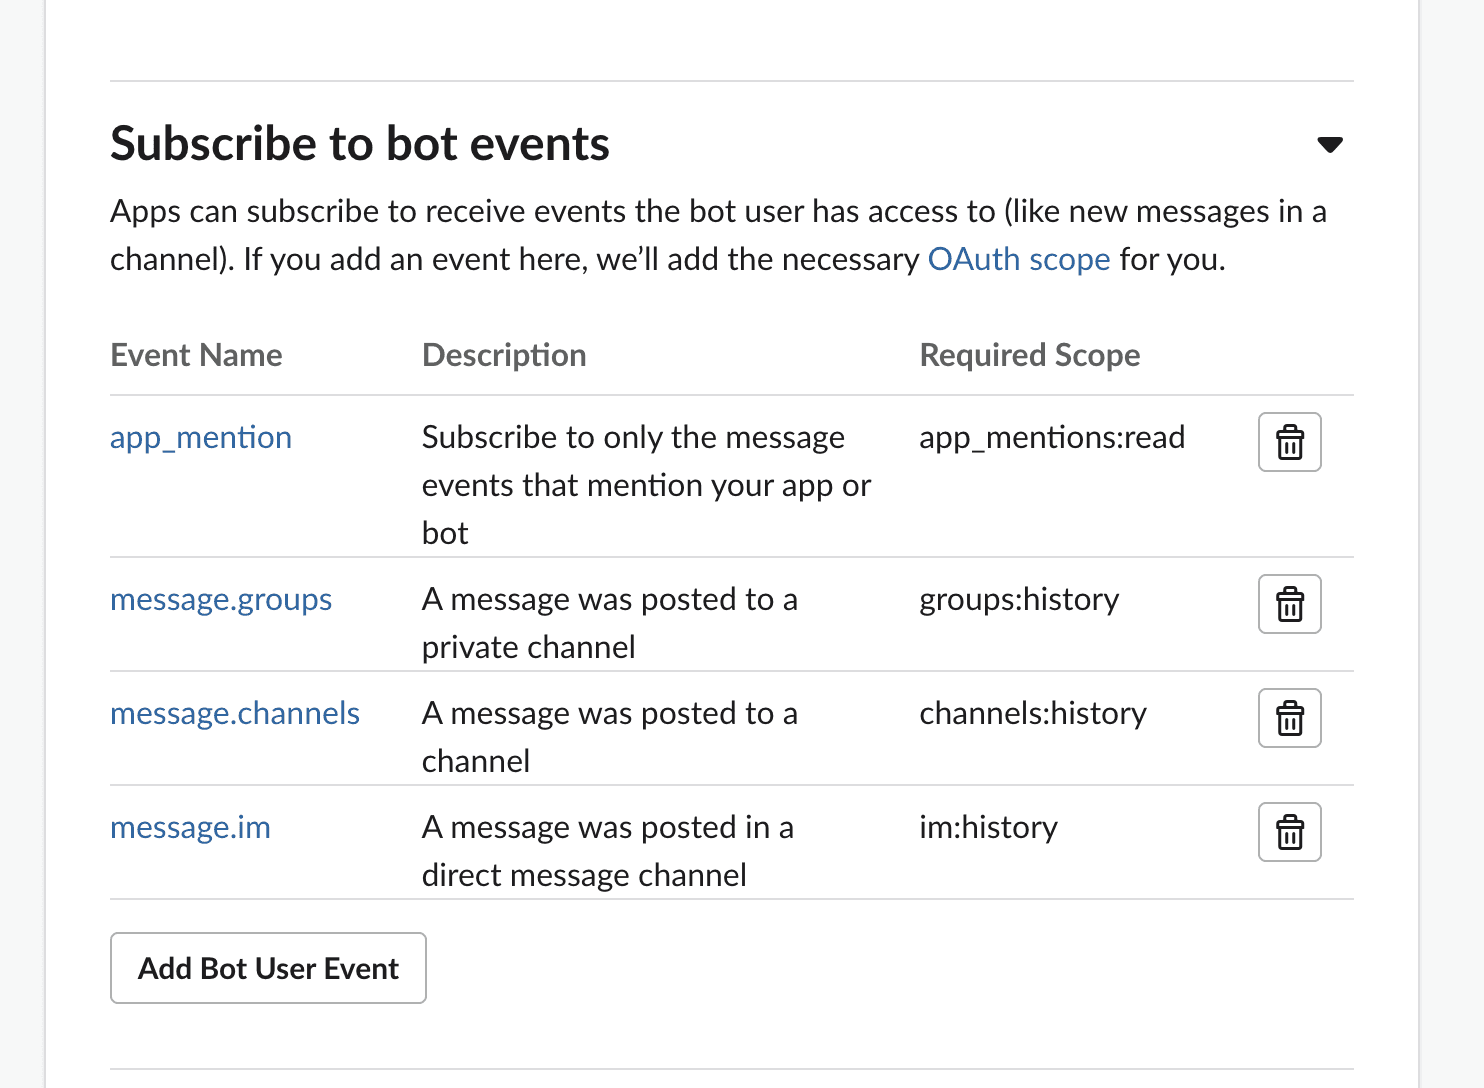
. Scroll to Subscribe to bot events, and pick app_mention, message.groups, message.channels and message.im
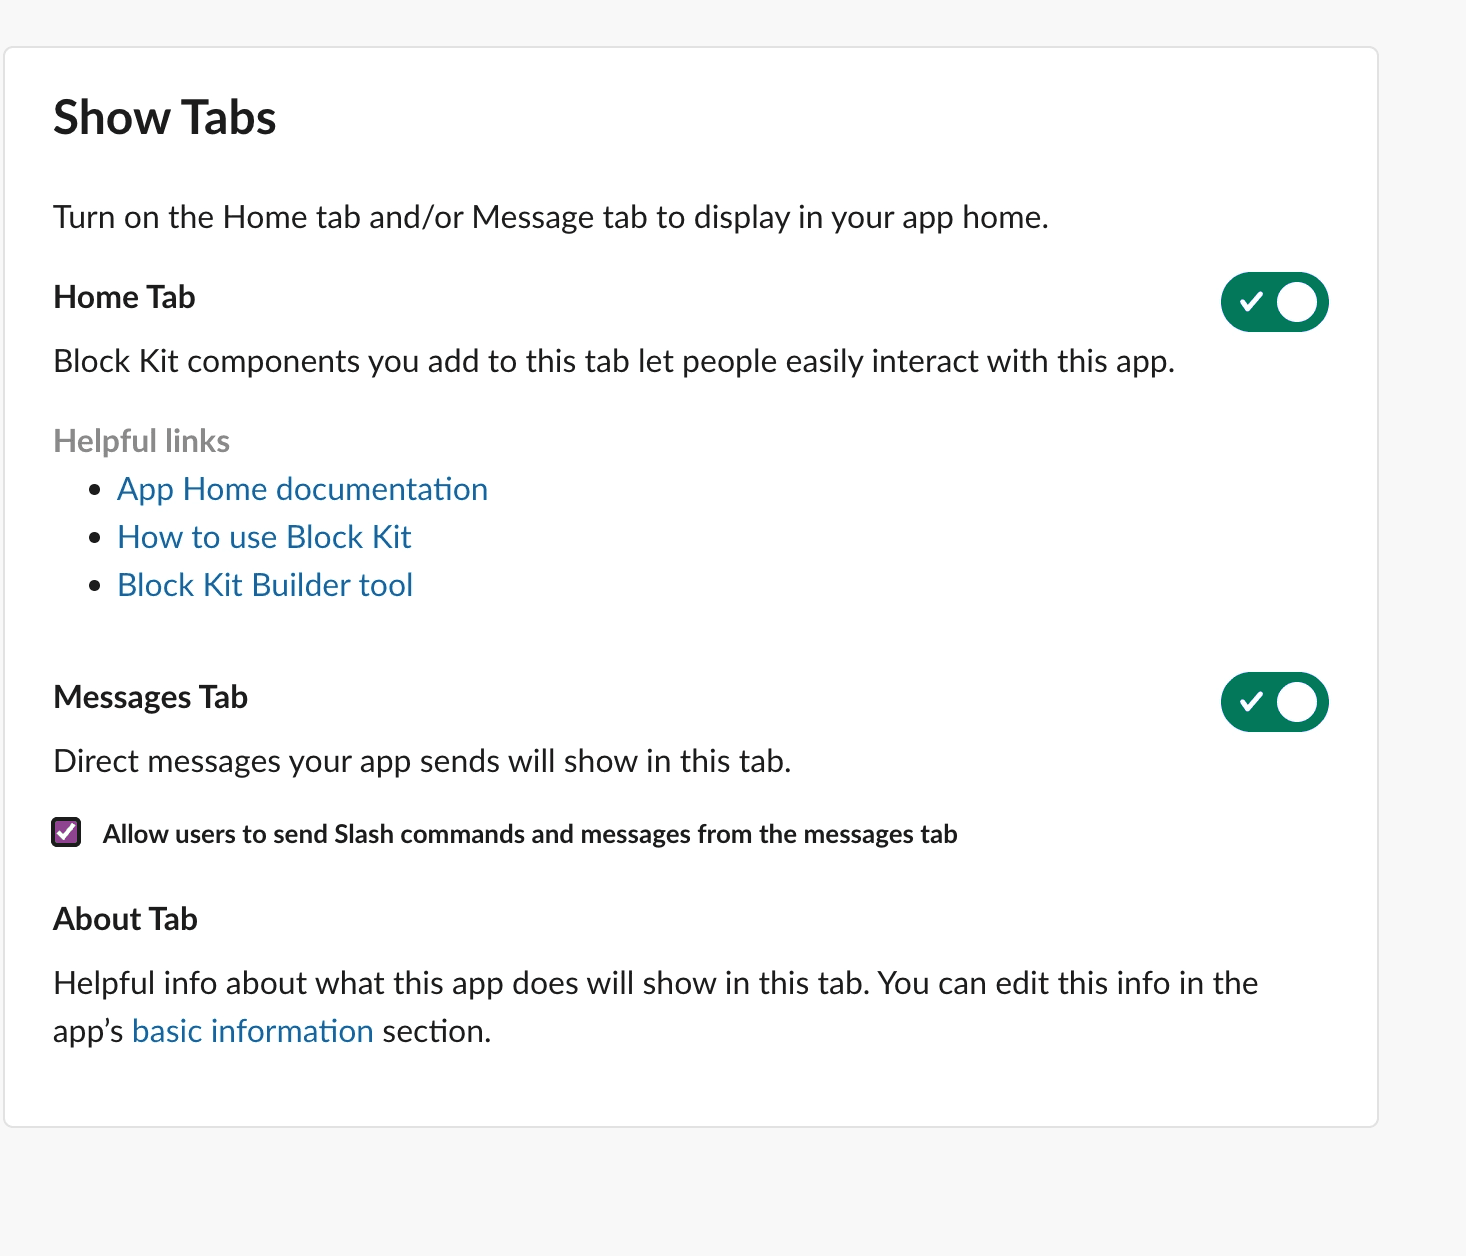
. Also enable App Home Messages Tab for DMs and check Allow users to send a message
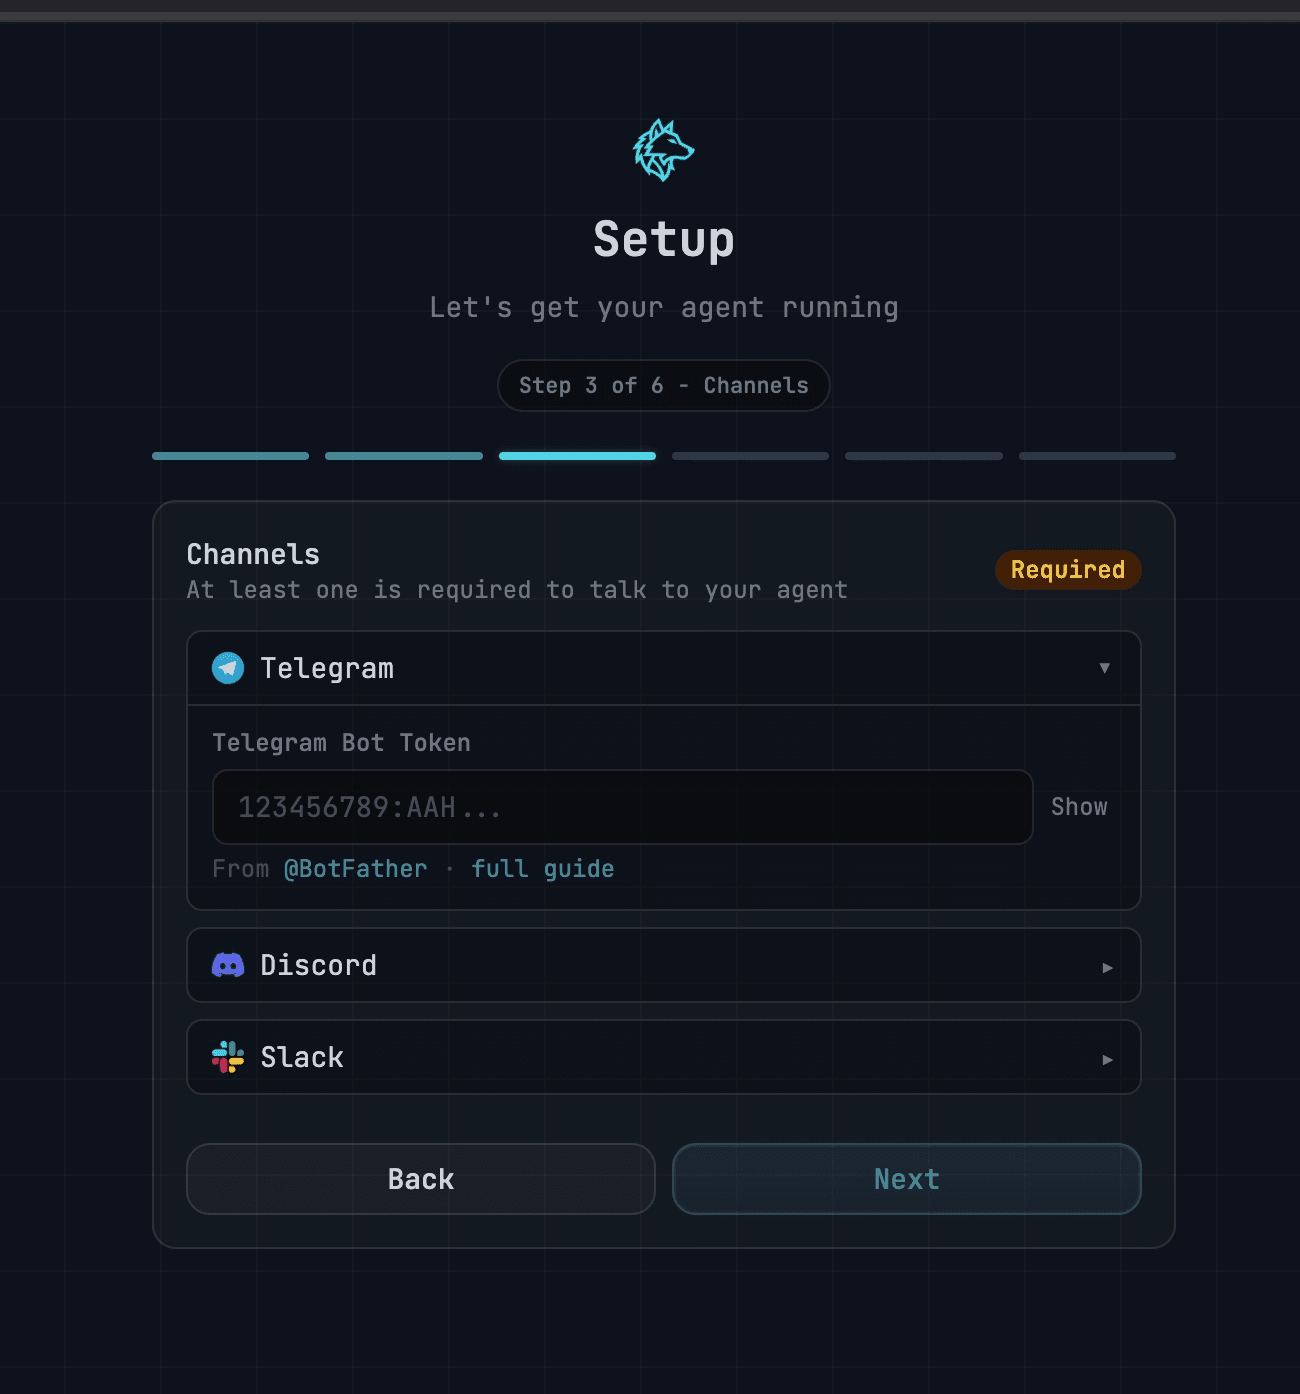
. Now switch back to AlphaClaw. Copy the tokens into the Step 3 of 6.
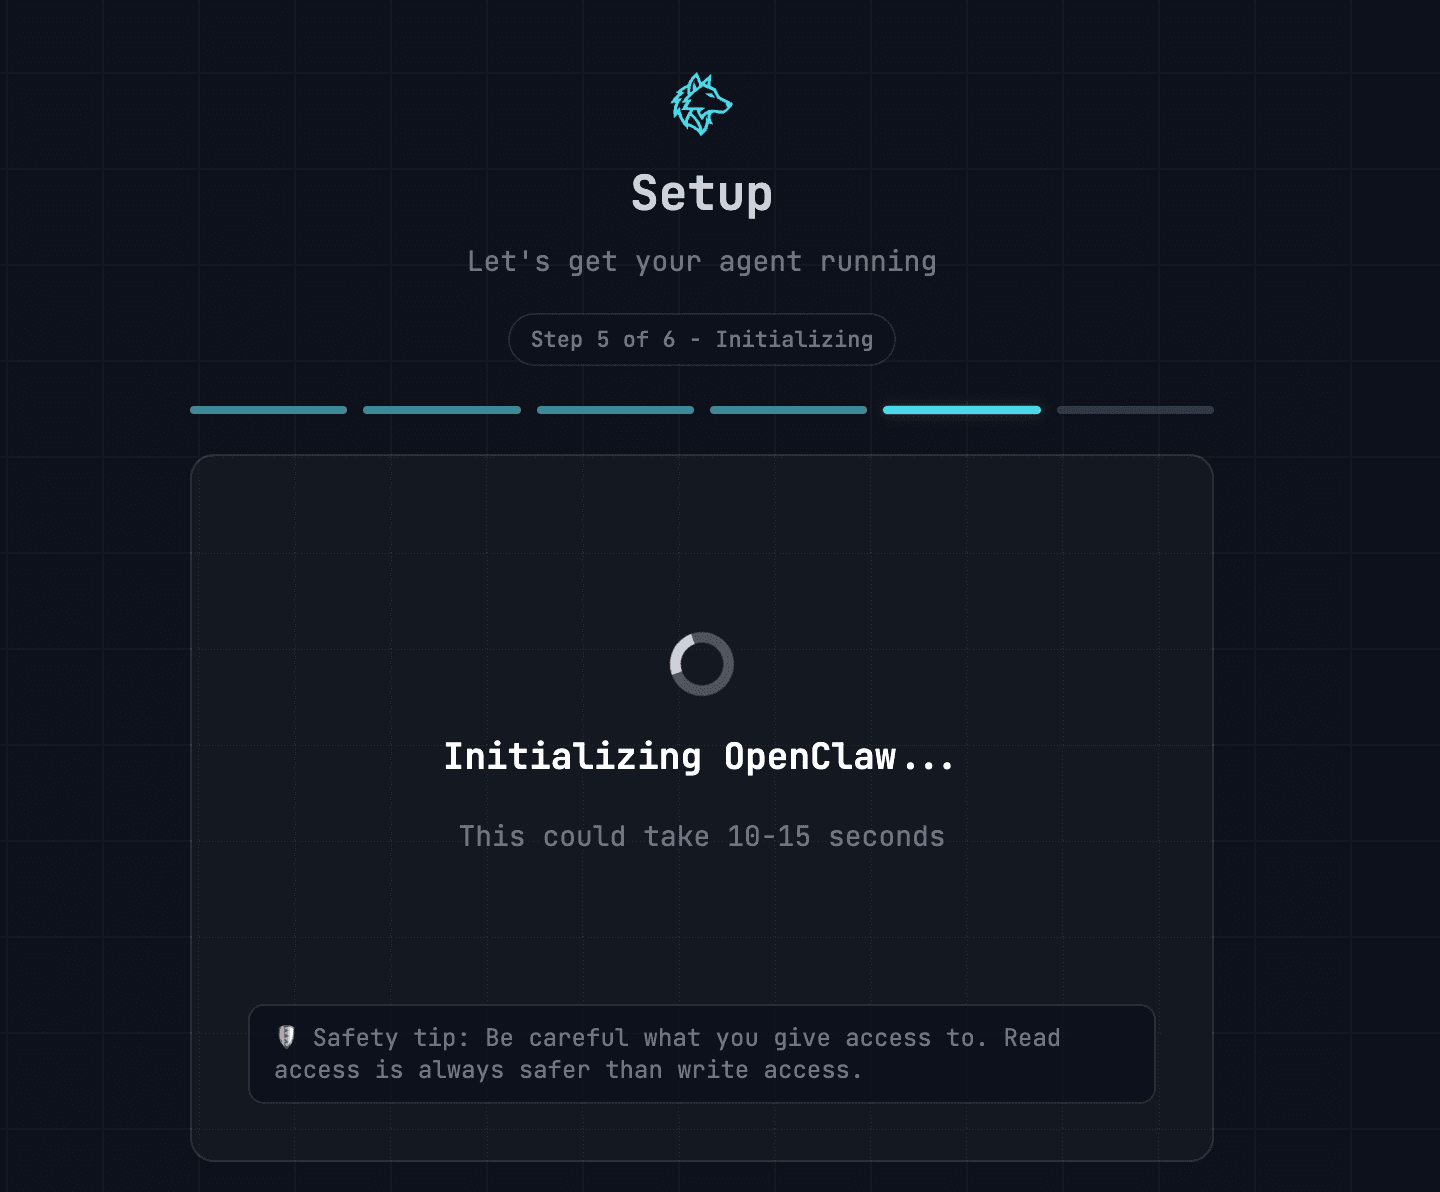
. Skip Step 4 to add the other api keys for now. You should see this step 5.
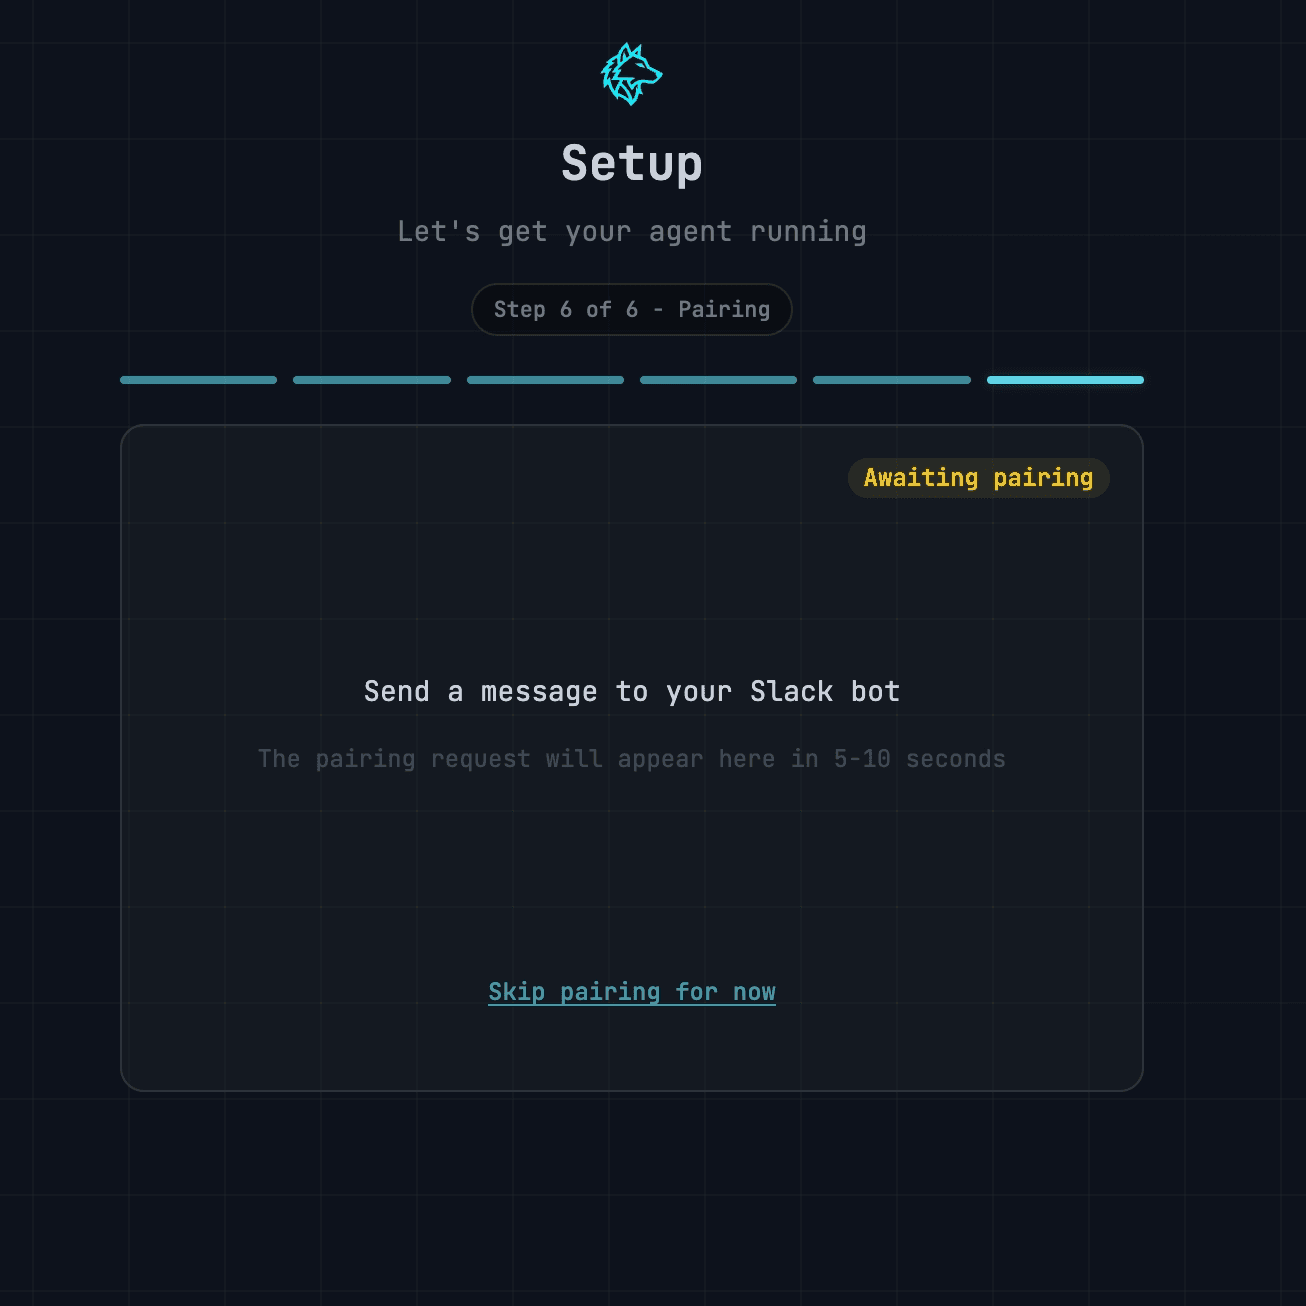
. Send a message to your Slack bot
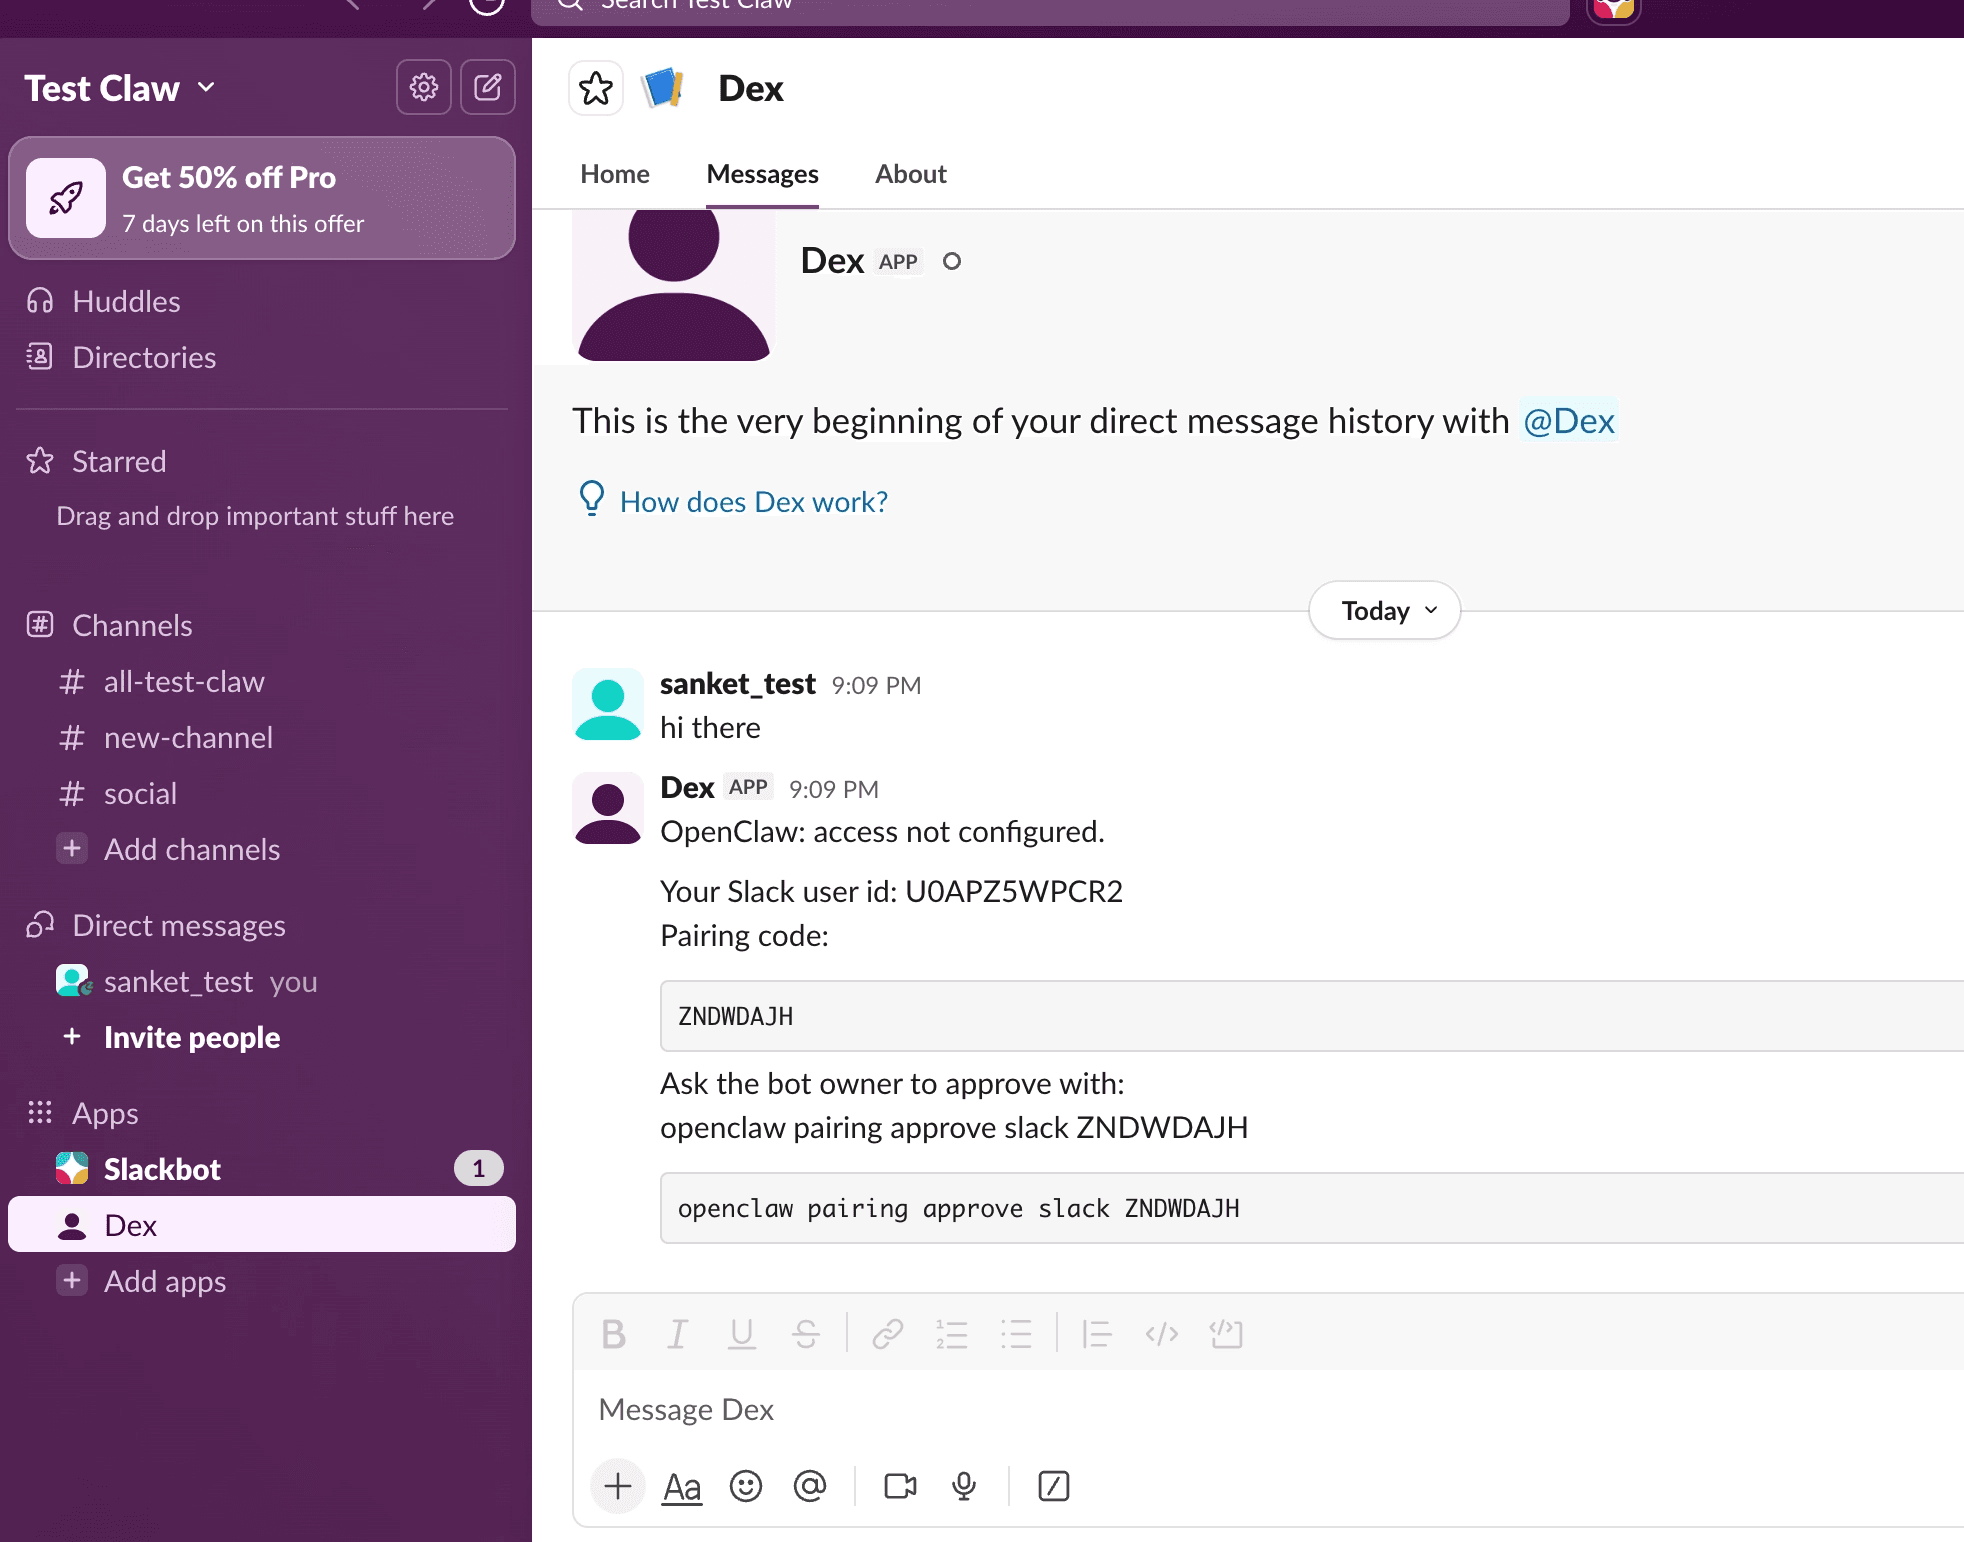
Send a message to Dex app. Switch to the AlphaClaw tab and click Approve

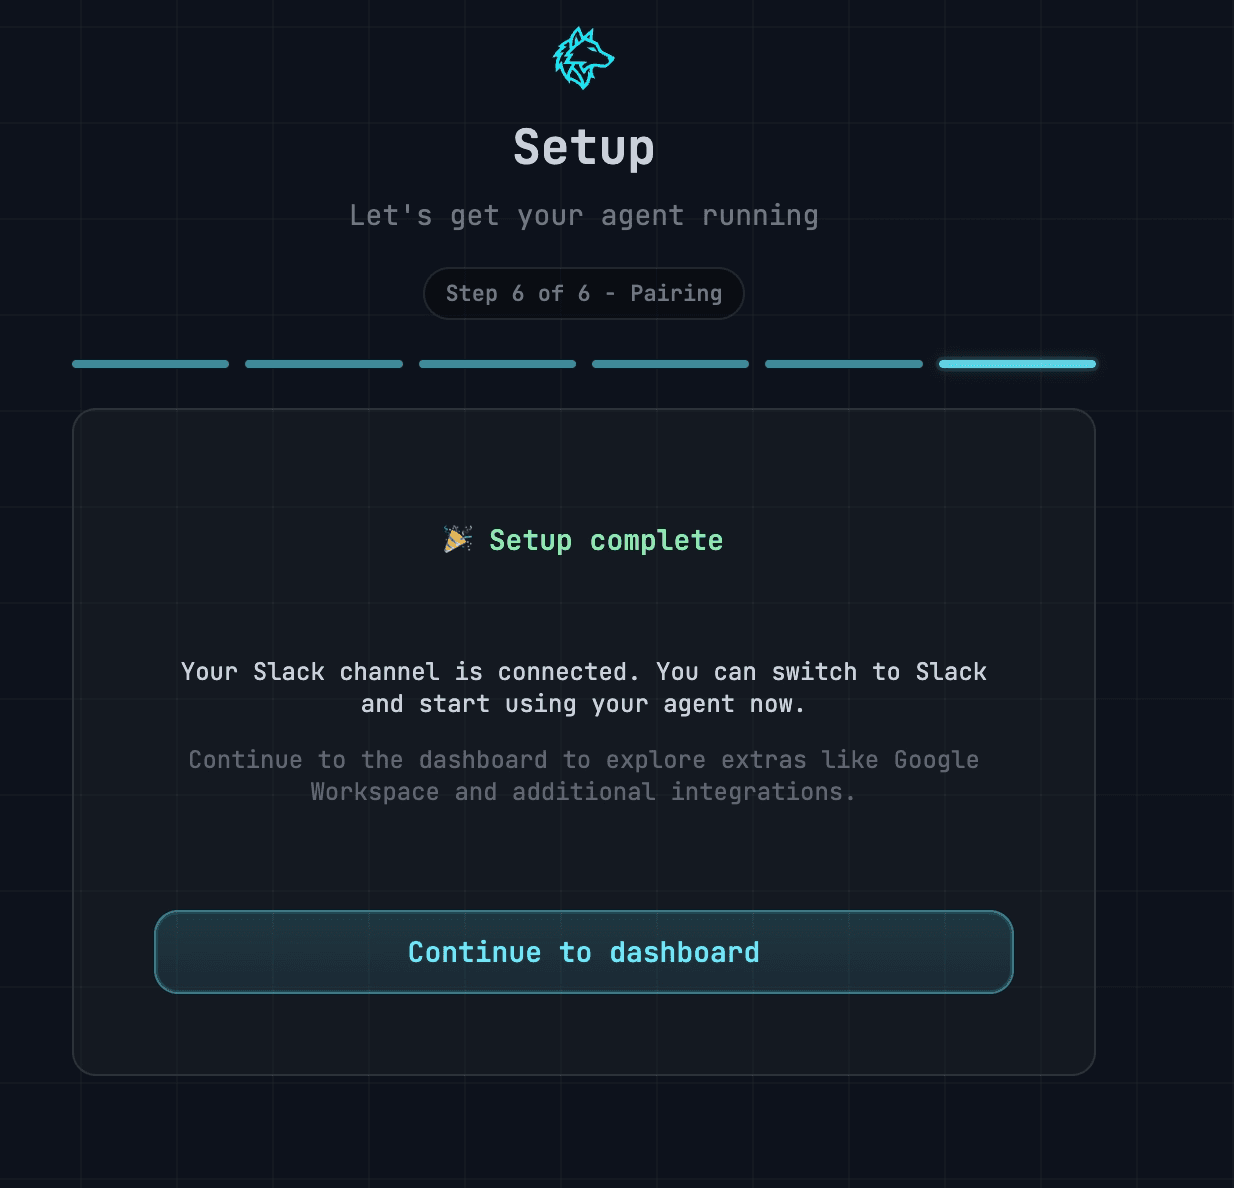
You should see a message like below:
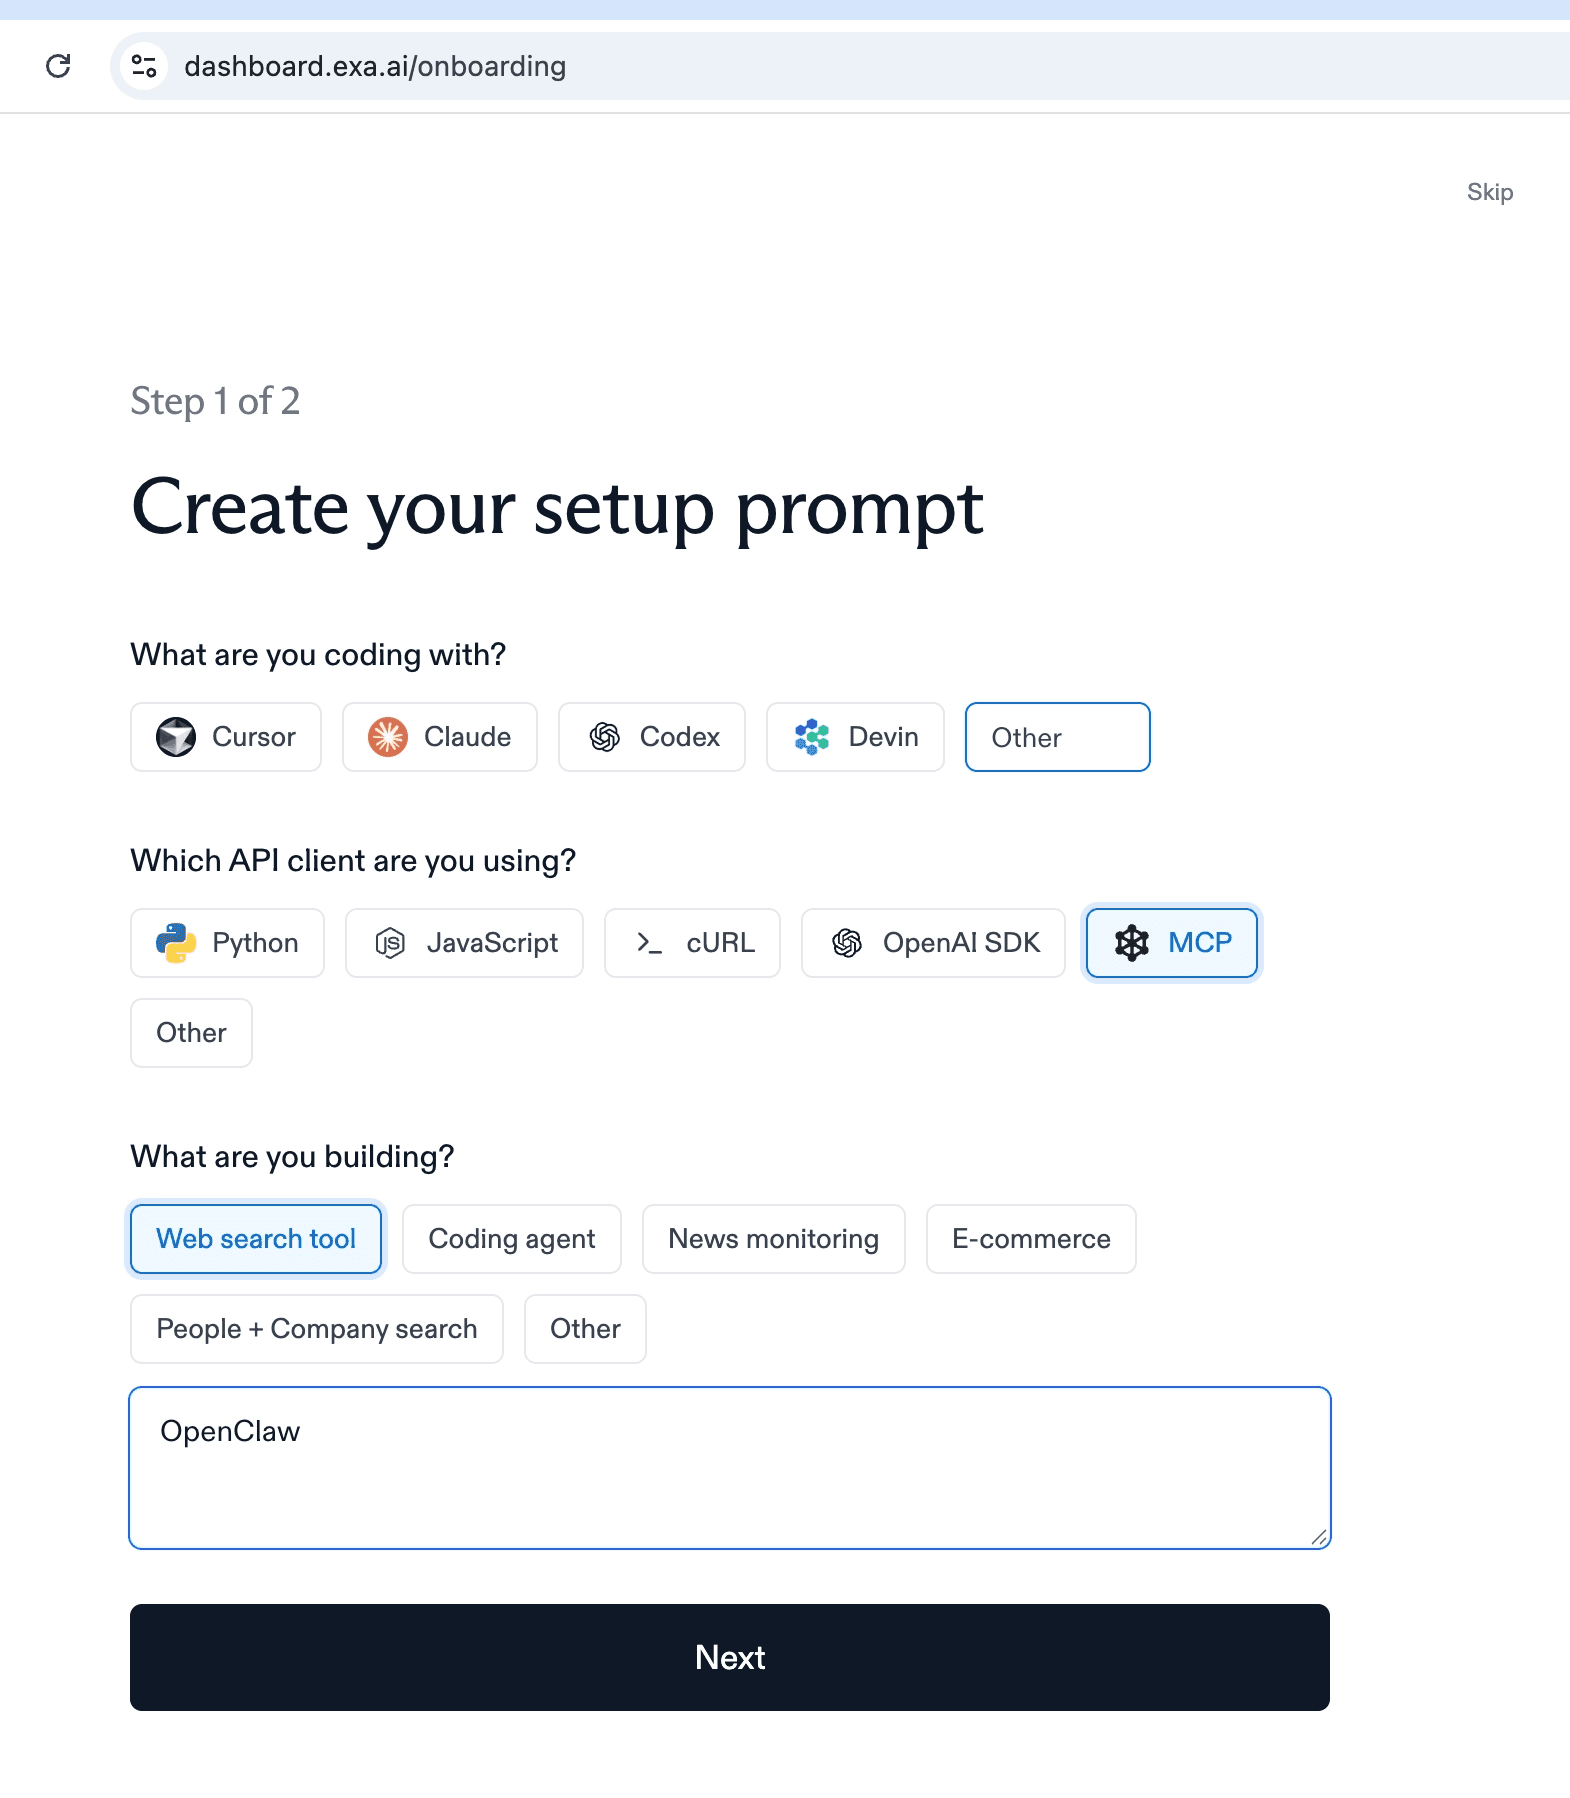
Setting up Exa
Goto https://auth.exa.ai/ to sign up for an account. Log in once you verify the email
Pick the following options in onboarding (but you can pick anything, you just need to finish the form to get the free credits 🙂 )
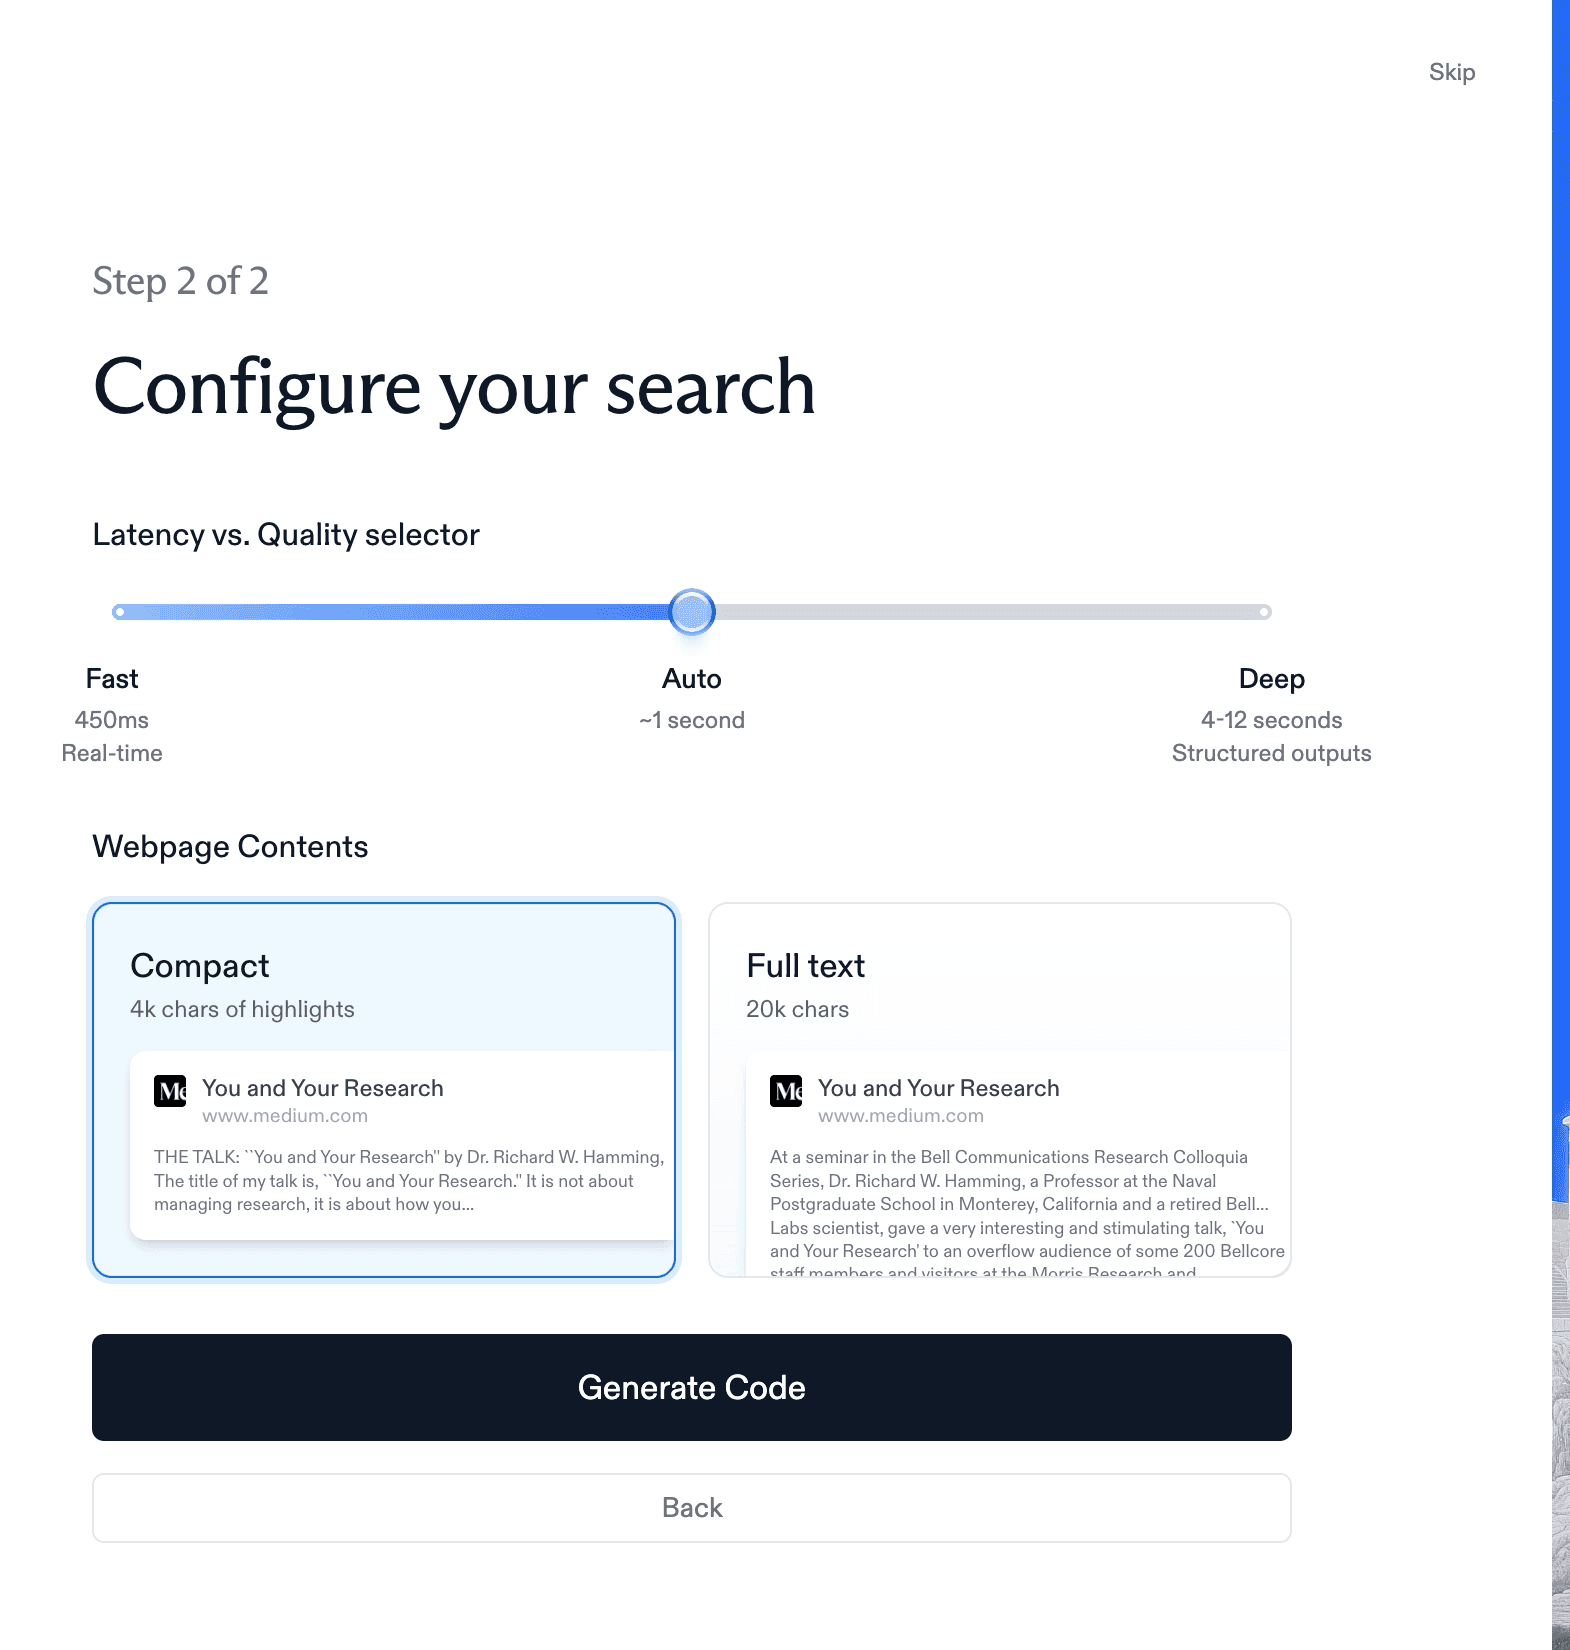
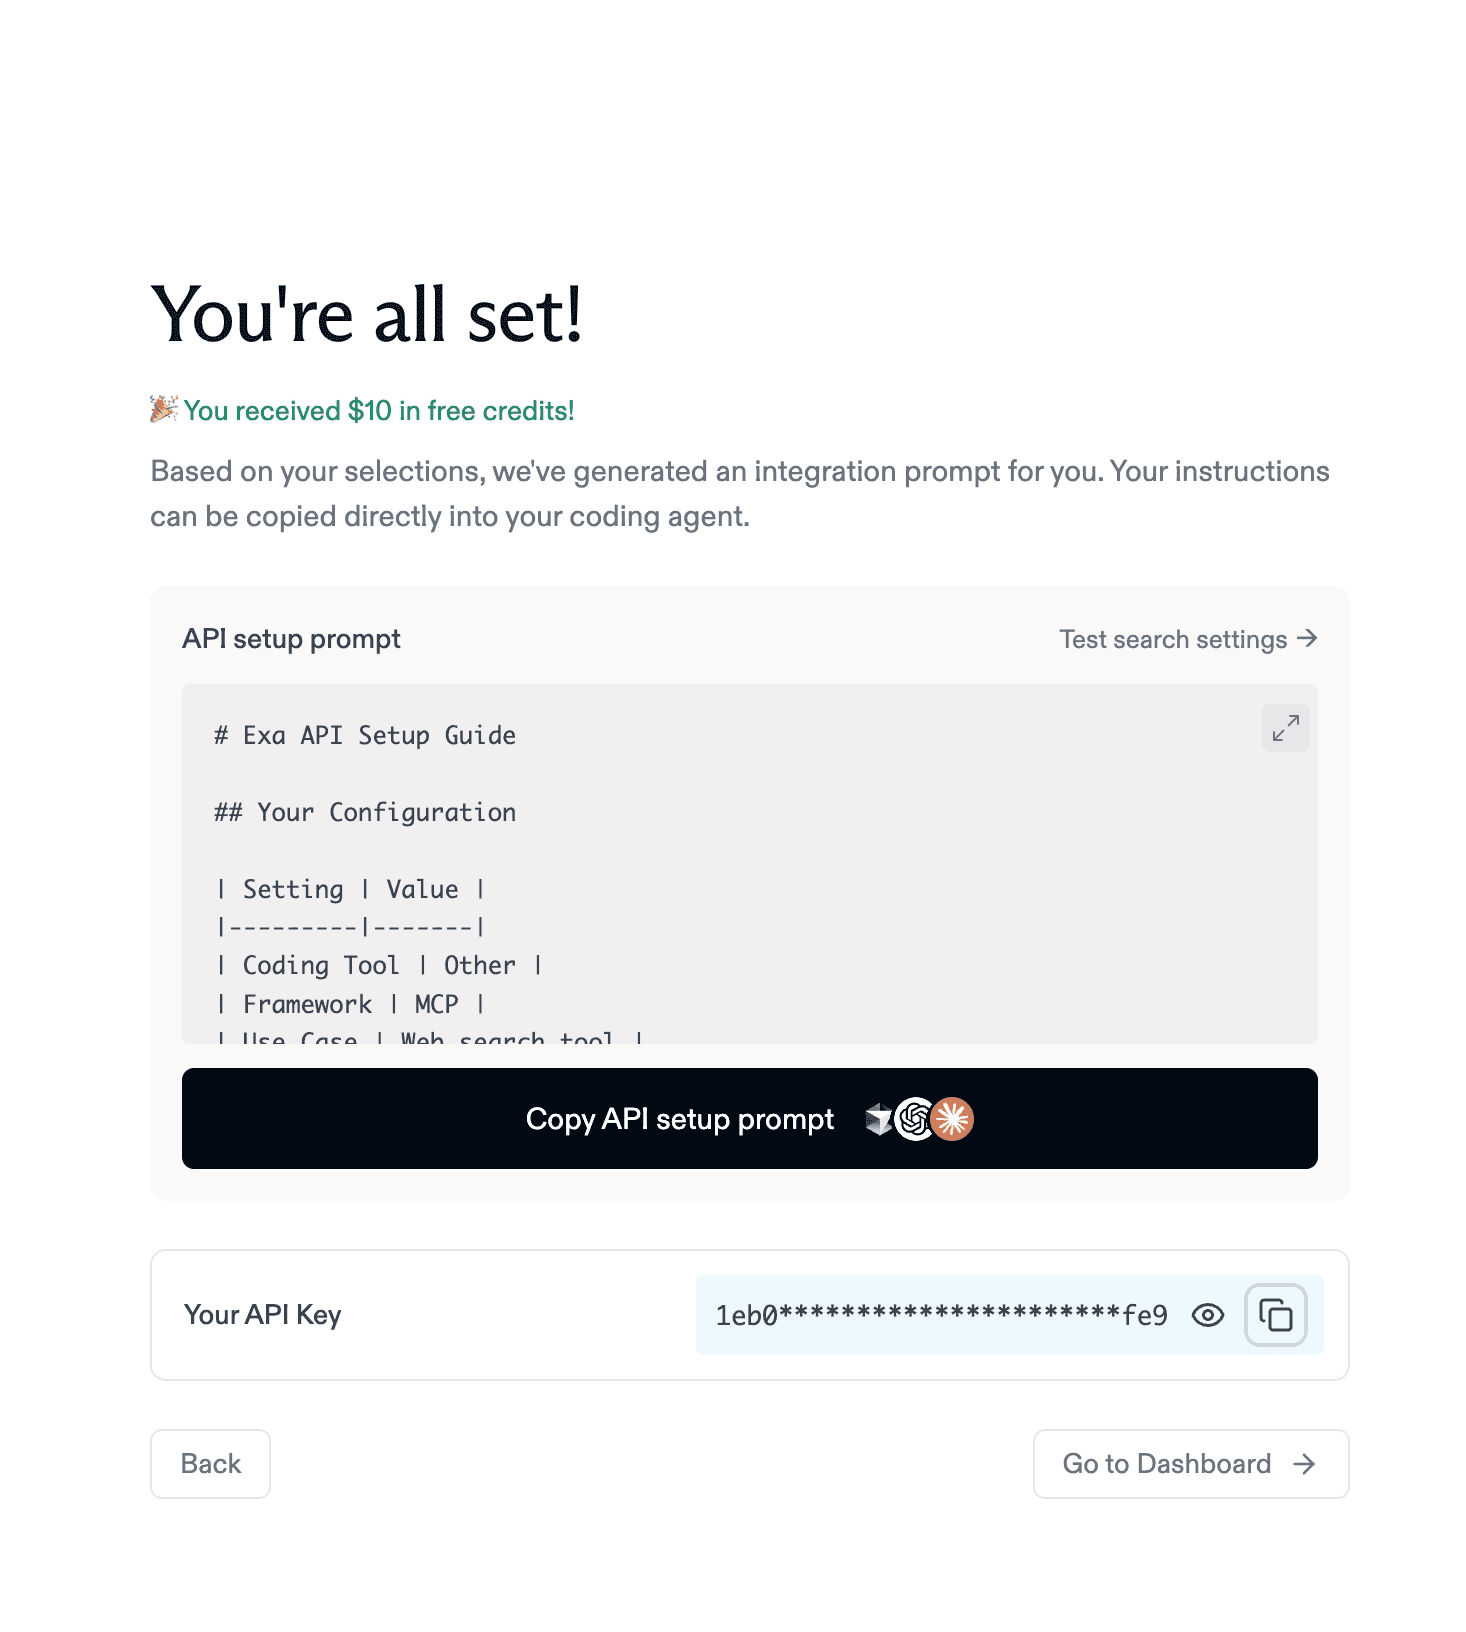
Pick generate code, and you ll see the api key to copy
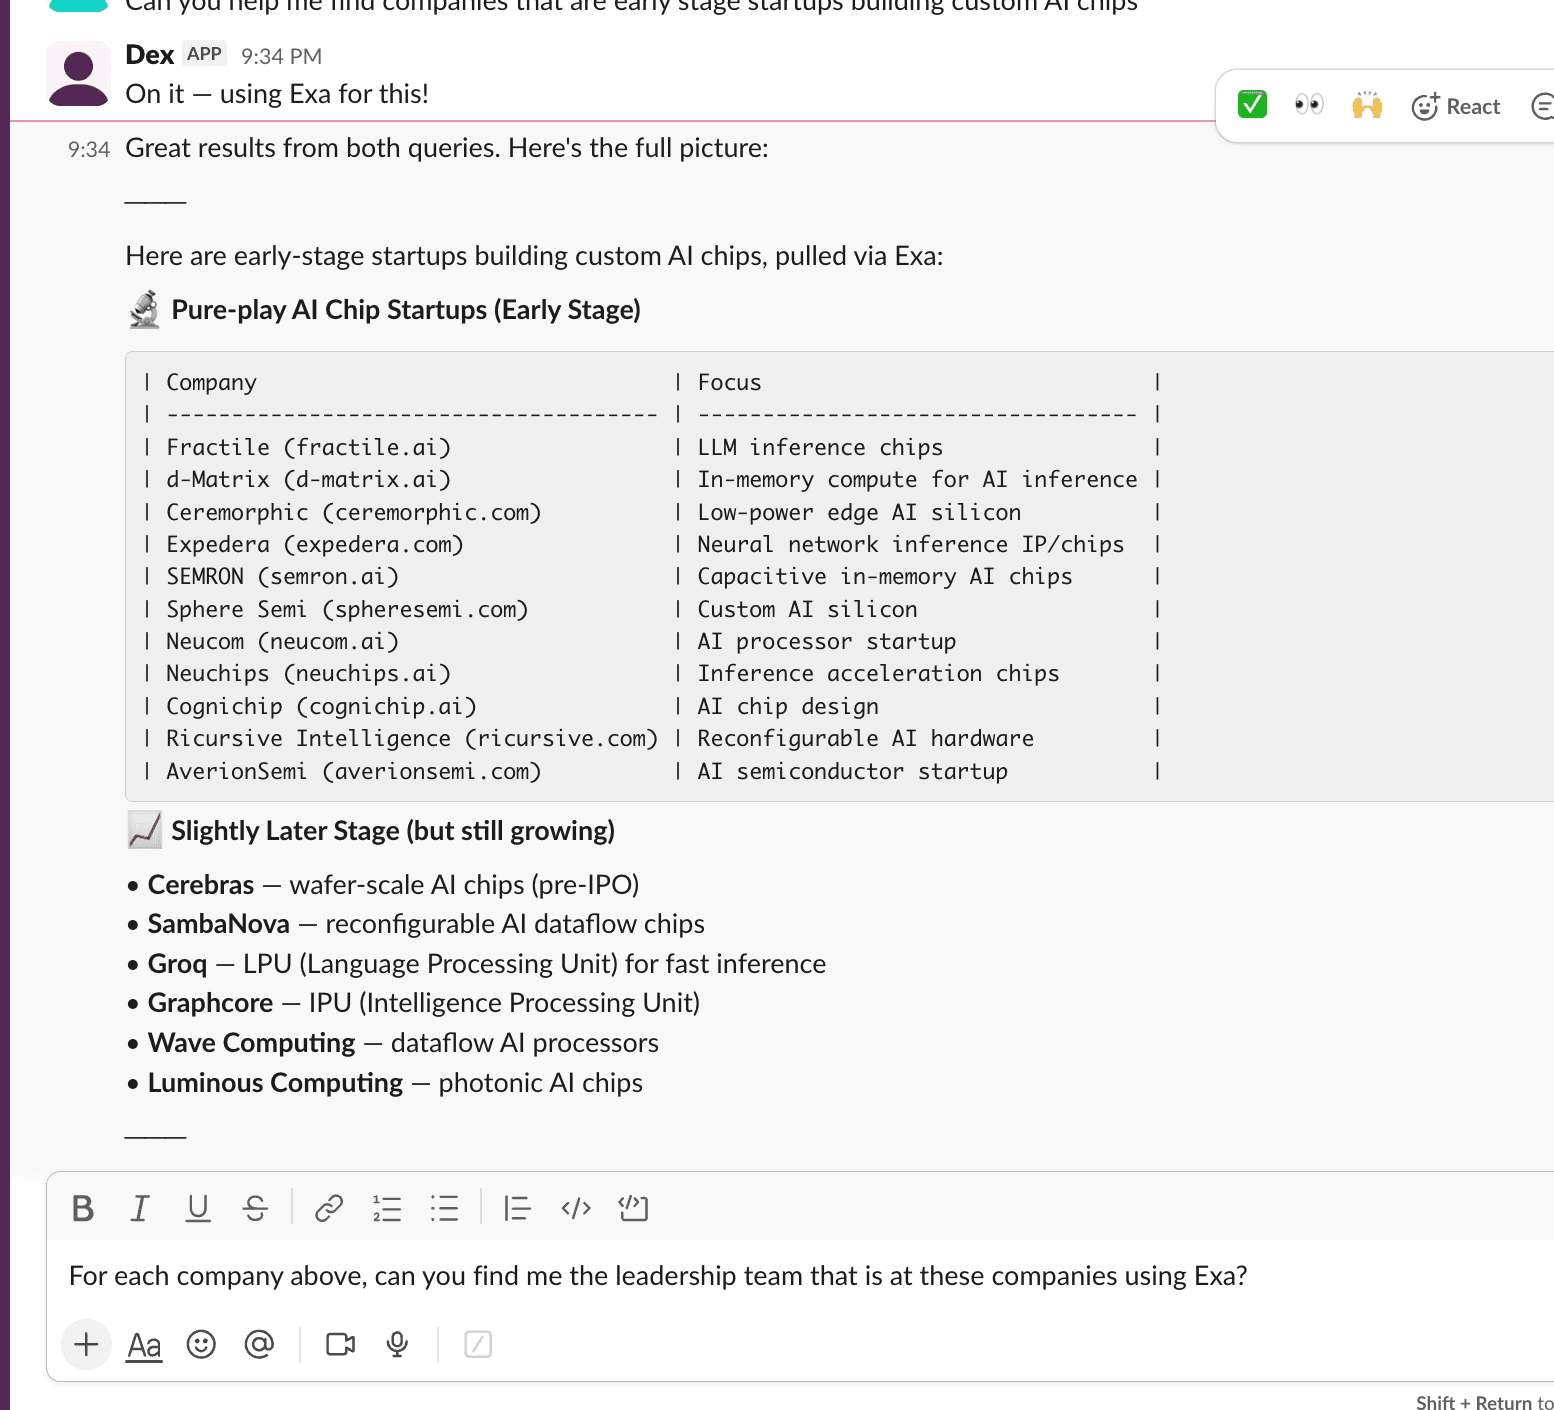
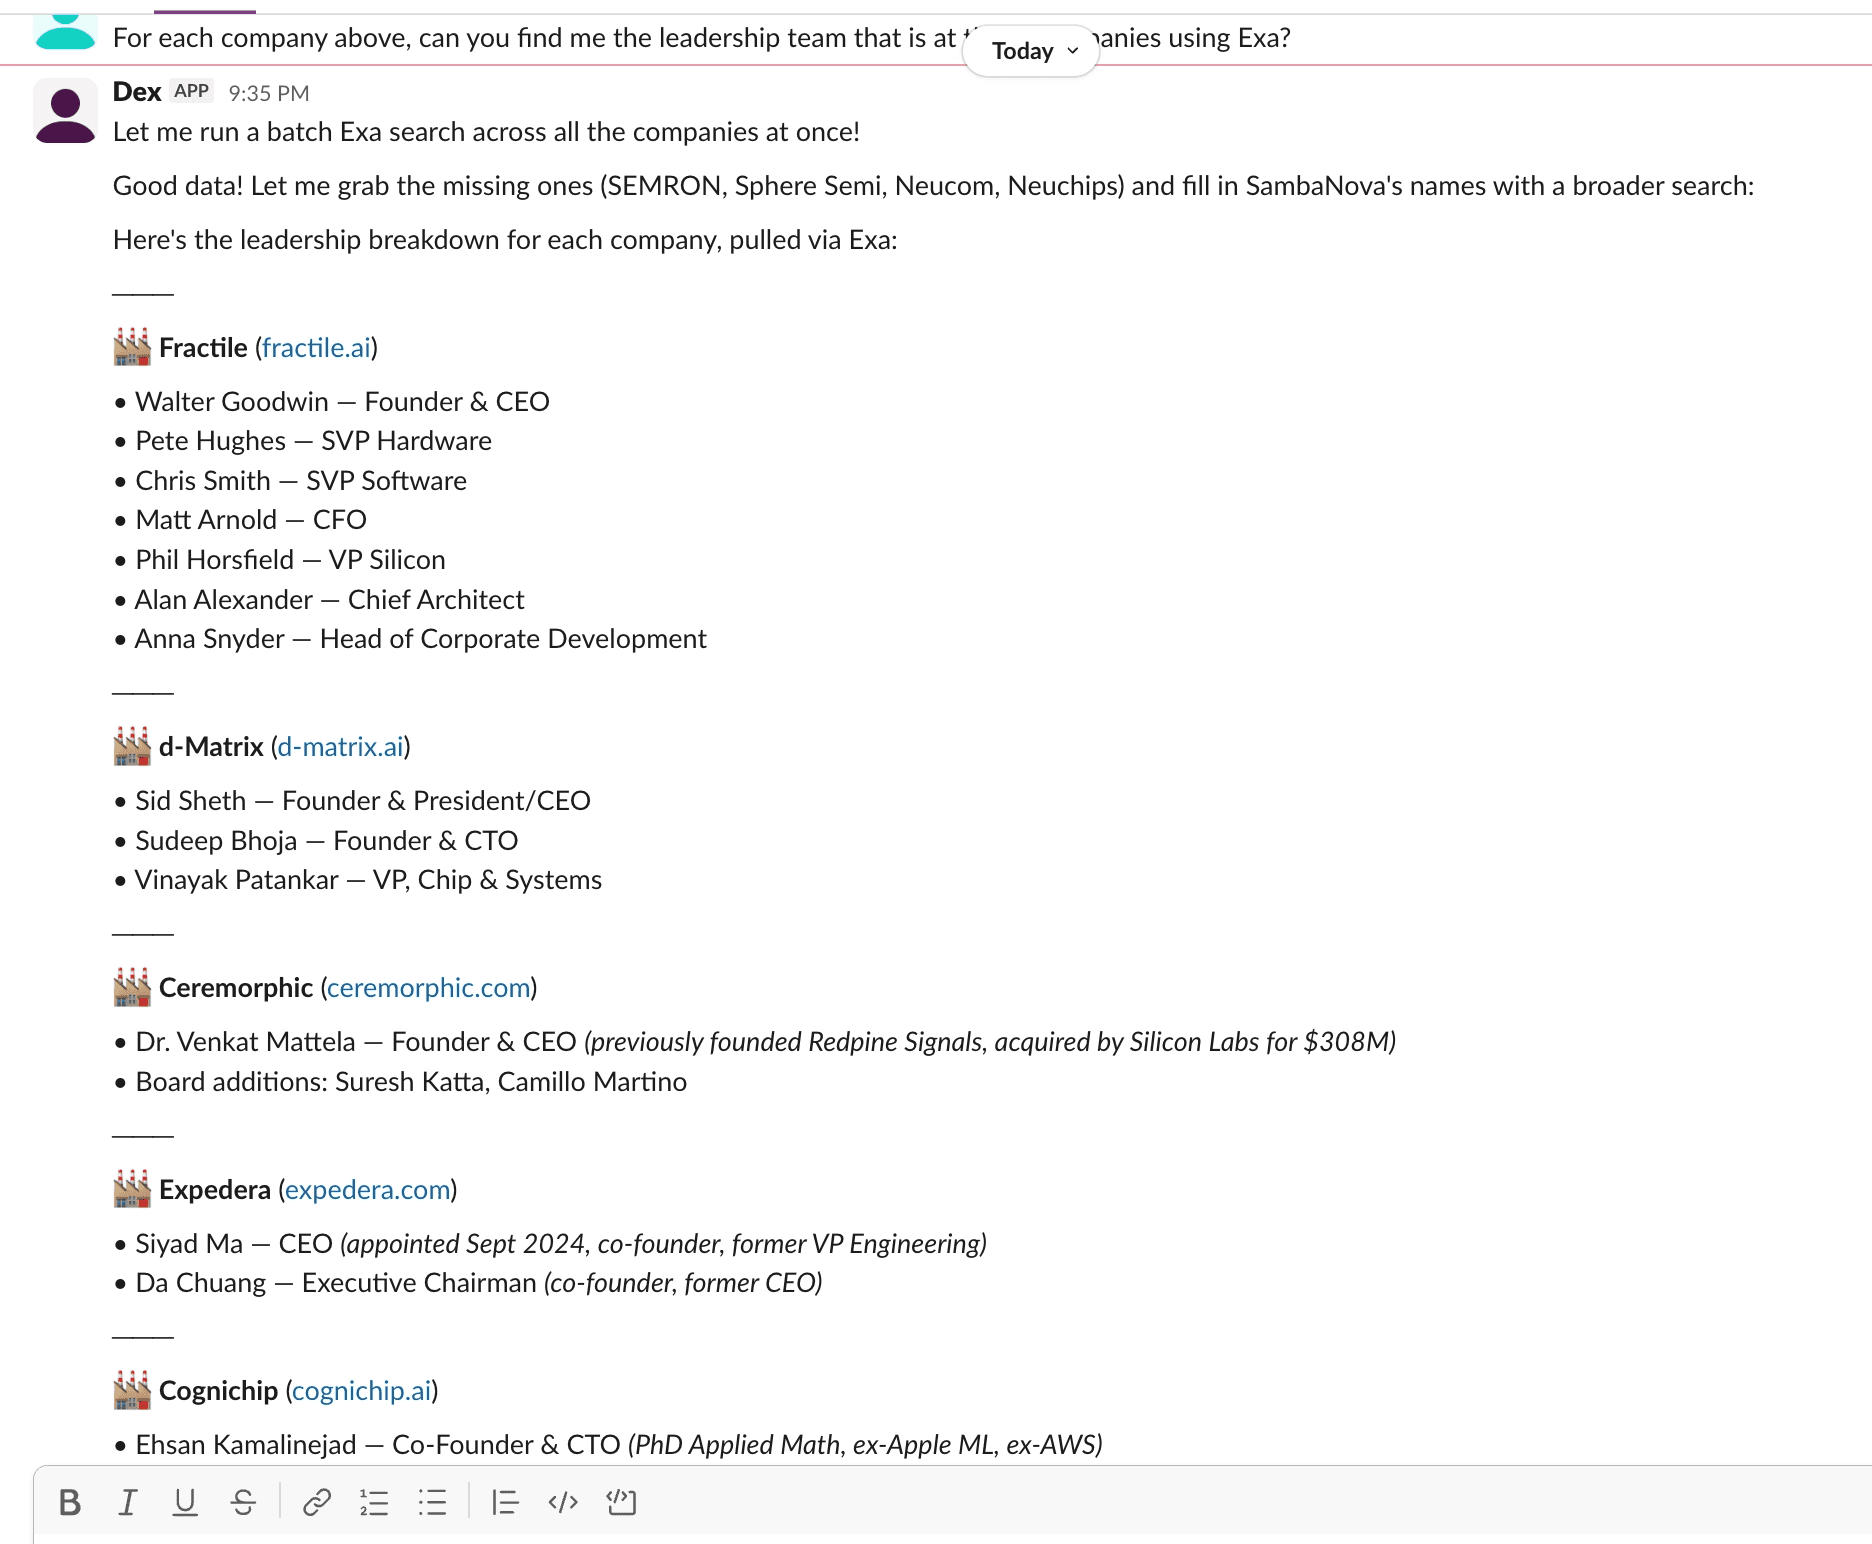
Here’s an example of adding that. Now try running a prompt in the future, and it’ll try to use that to get better results. The same thing works for people search as well.